DNS Management Extension
About
DNS Management For EasyDCIM extension enables remote management of DNS zones and rDNS records, including their automatic creation upon order activation.
Features
- Create And Manage DNS Zones
- Create And Manage rDNS
- Create DNS Zone Automatically Upon Service Provisioning
- Create rDNS Records Automatically Upon Service Provisioning
- Import Zones From Chosen Server
- View Zone Usage Statistics
- Set Up Multiple Configurations
- Manage DNS At Device Summary Section
- Management Section In The Client Area
- Create Your Own DNS Submodules
- View Event Log
- Integrated With IP Address Management Extension
Supported submodules
- cPanel
- DirectAdmin
- PowerDNS 4 Via API
- PowerDNS 3 Via Database
- Sample Submodule
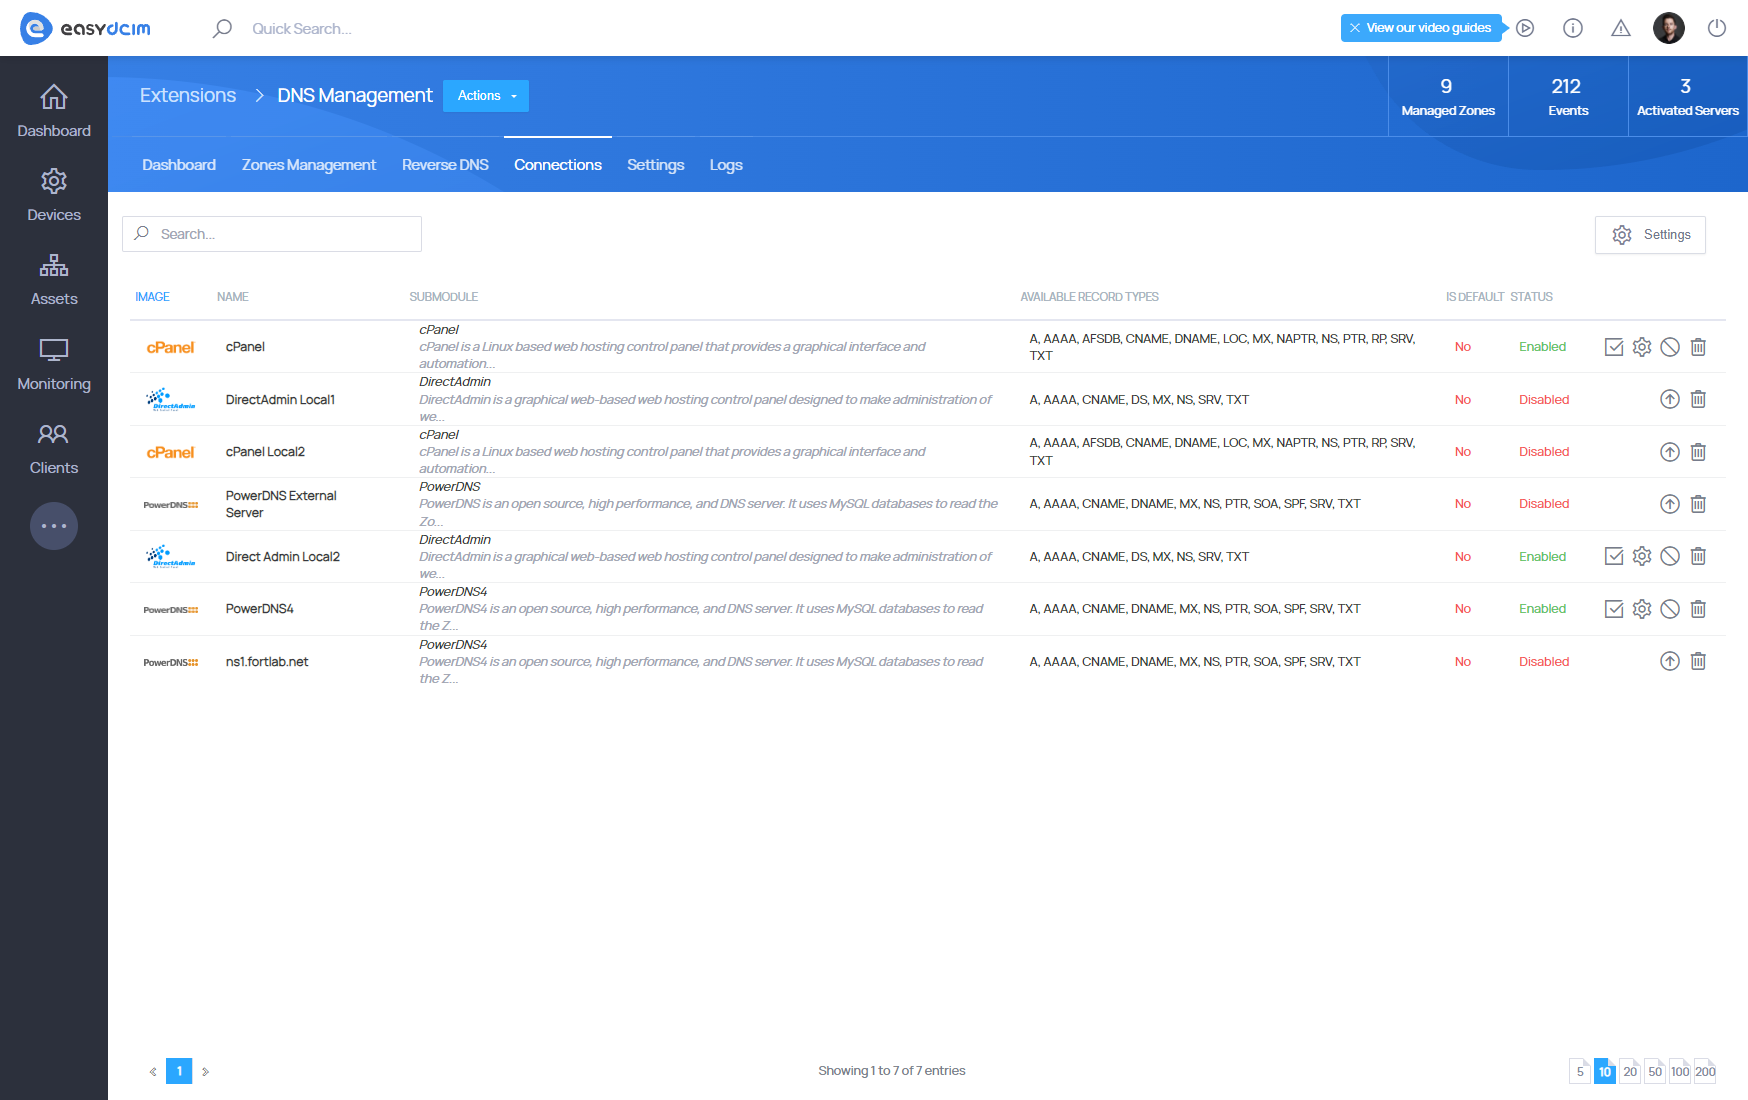
Connection configuration
In order to start using the DNS Management extension, a connection to a server that supports DNS zone management must be established. To do this, go to the DNS Management extension and then select the “Connections” tab. Choose the “Add Server” option from the action menu. The add form contains two basic fields:
- Name - any name of the connection
- Submodule - the module based on which the connection will be established. You can choose any module from the list of supported modules
After saving the data, you will be redirected to the remote server connection form. Depending on the selected submodule, the form may contain different fields. In the case of the “cPanel” submodule these are:
- Username - enter the user name
- User Password - the password of the user
- Access Key - remote access key that allows to log in to the server without providing the password
- Hostname or IP Address - hostname or IP address of the cPanel server
- Enable SSL - determine whether the connection is encrypted with a certificate
- Default TTL - the default lifetime for which the record is valid
- Default IP - DNS zone default IP address
- In cPanel Zones - allows zones to be created when the account exists in cPanel
- Template - define a custom template of DNS zones
After entering the access data we can perform the Test Connection action which will verify if the connection can be established correctly. If there are no errors, we can save the changes and the connection will be added to EasyDCIM.
Assigning connection
EasyDCIM automatically determines which connection should be used for a particular device. This applies to all actions such as creating/deleting DNS zones and creating/deleting rDNS records. Automatic connection selection scheme:
- The system searches for all connections that are active. Connections marked as default have higher priority
- Each connection can be assigned to a particular location, floor or rack. This option is available in the “Assignment” section in the edit connection view
- If the connection does not support rDNS records, you will get an error
- If connection is not assigned to any entity, then it works for all entities automatically
DNS zone management per device
DNS zones can be added and removed from the device summary view in EasyDCIM. To do this, select the appropriate devices and then choose the “DNS Management” tab in the summary view.
The “Managed Zones” widget lists the DNS zones assigned to the device. To create a new DNS zone, select the “Create Zone” option. The zone creation form contains the following fields:
- Zone Name - a name of the DNS zone
- IP Address - the IP address of the DNS zone. Remember that you can only assign the IP address that belongs to this device
After creating the DNS zone, we can go to the zone management view. This option is located in the table and is marked with a summary icon. From here, you can freely add, edit, and delete records within the DNS zone.
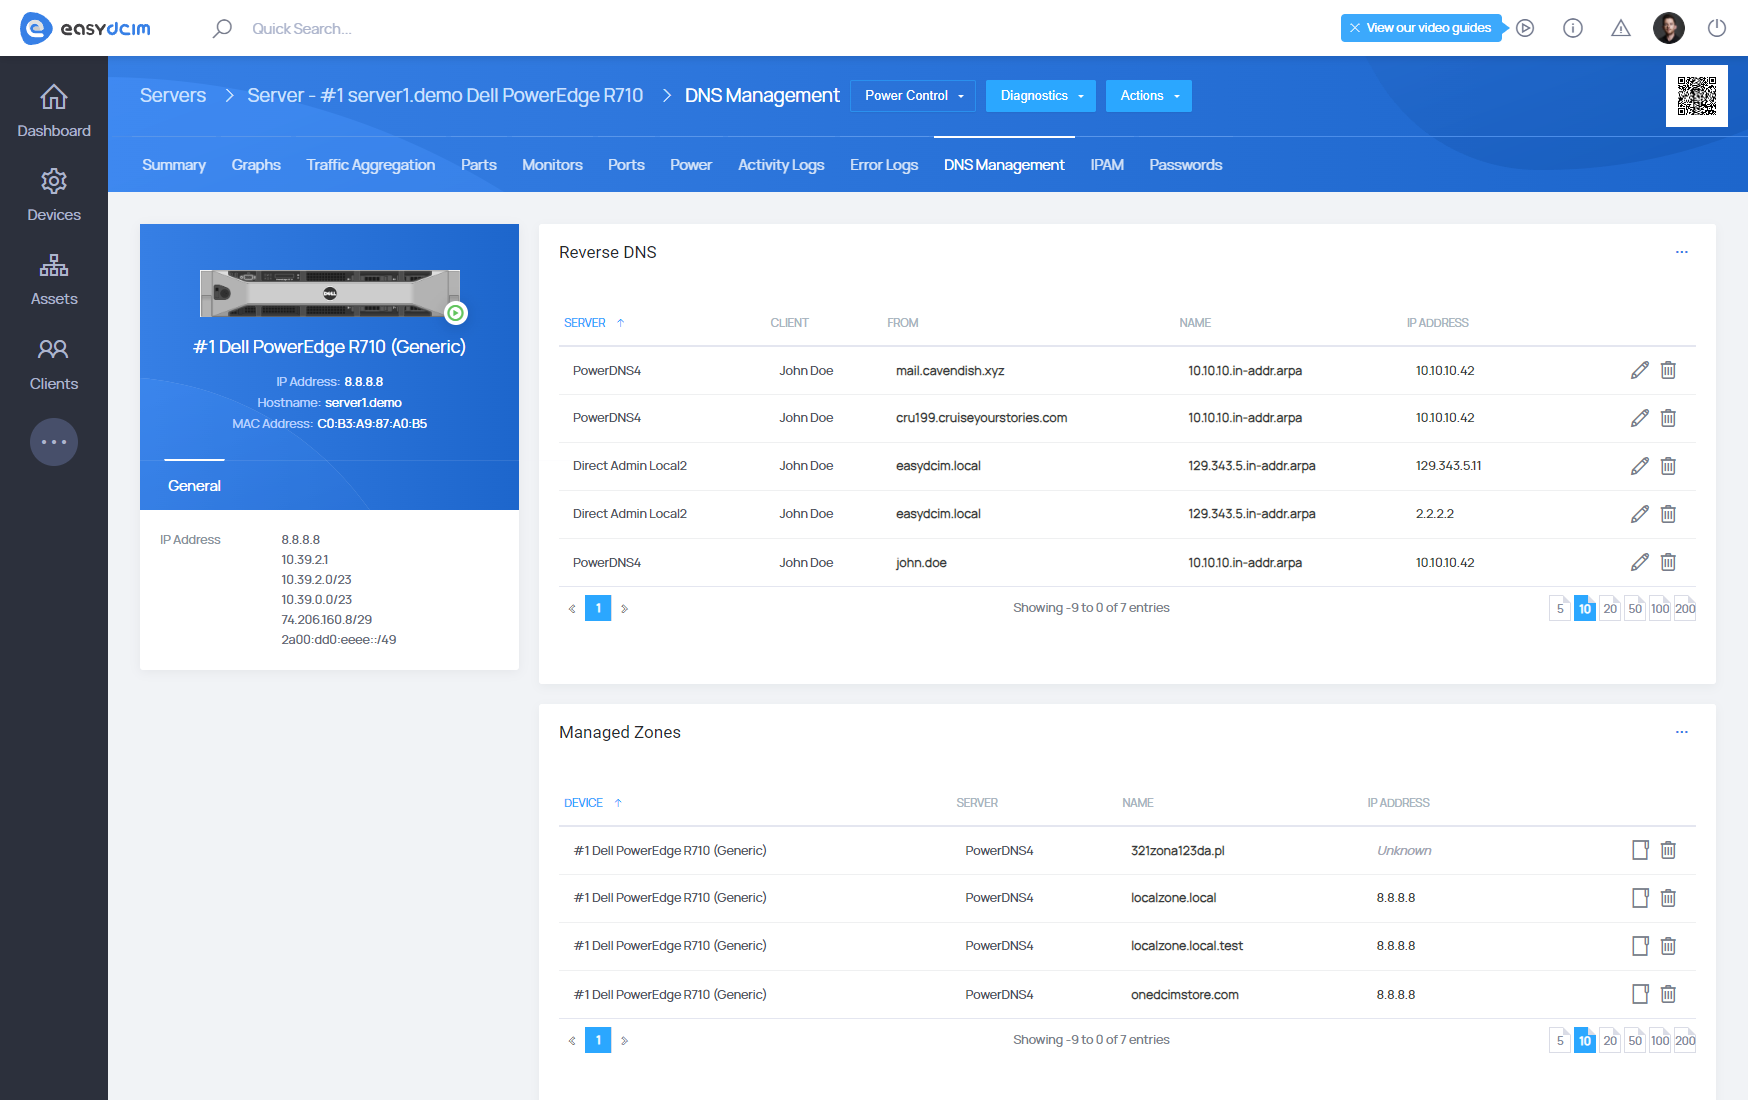
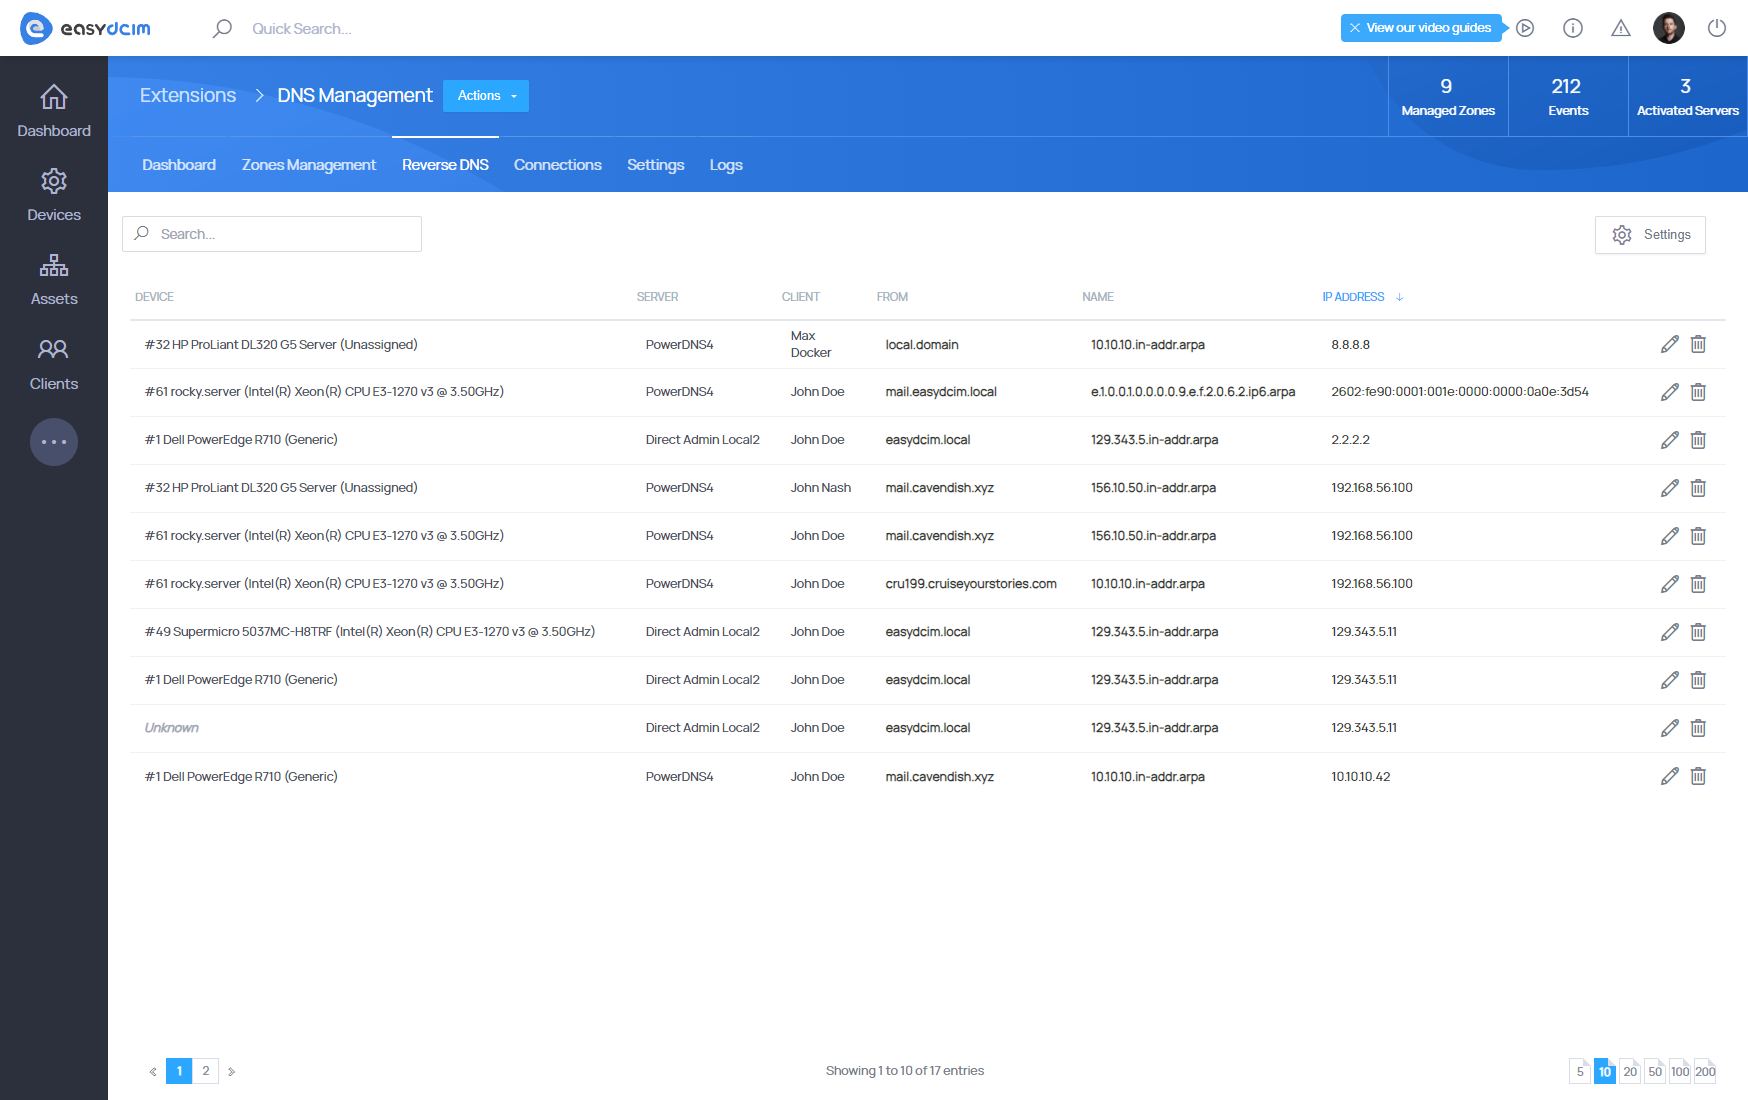
rDNS records management per device
You can add and delete rDNS records from the device summary view in EasyDCIM. To do this, select the appropriate devices and then choose the “DNS Management” tab in the summary view. Please note that some submodules do not support the management of rDNS records.
The “Reverse DNS” widget lists the rDNS records assigned to the device. To create a new rDNS record, select the “Create Record” option. The zone creation form contains the following fields:
- IP Address - IP address of the rDNS record. We can assign only the IP address that belongs to this device
- RDATA - value of the rDNS record
You can freely edit and delete rDNS records from the table using the appropriate options. The list of added rDNS records can be found in the corresponding extension tab:
Automation in provisioning process
The rDNS records and DNS zones can be automatically created and deleted during the provisioning process. In the order summary, we can specify the performance of the following actions:
- [DNS Management] Create zone - this option automatically creates a DNS zone based on the values specified in the order. The zone IP address is the primary IP address assigned to the IP Address metadata. The hostname value is taken from the order configuration.
- [DNS Management] Create rDNS records - this option automatically creates rDNS records for all IP addresses assigned to the device. These include IP addresses found in the metadata of IP Addresses, Additional IP Addresses, and subnets IP addresses assigned using the IP Address Management extension
- [DNS Management] Delete zones and rDNS records - this option automatically removes all DNS zones and rDNS records assigned to the device
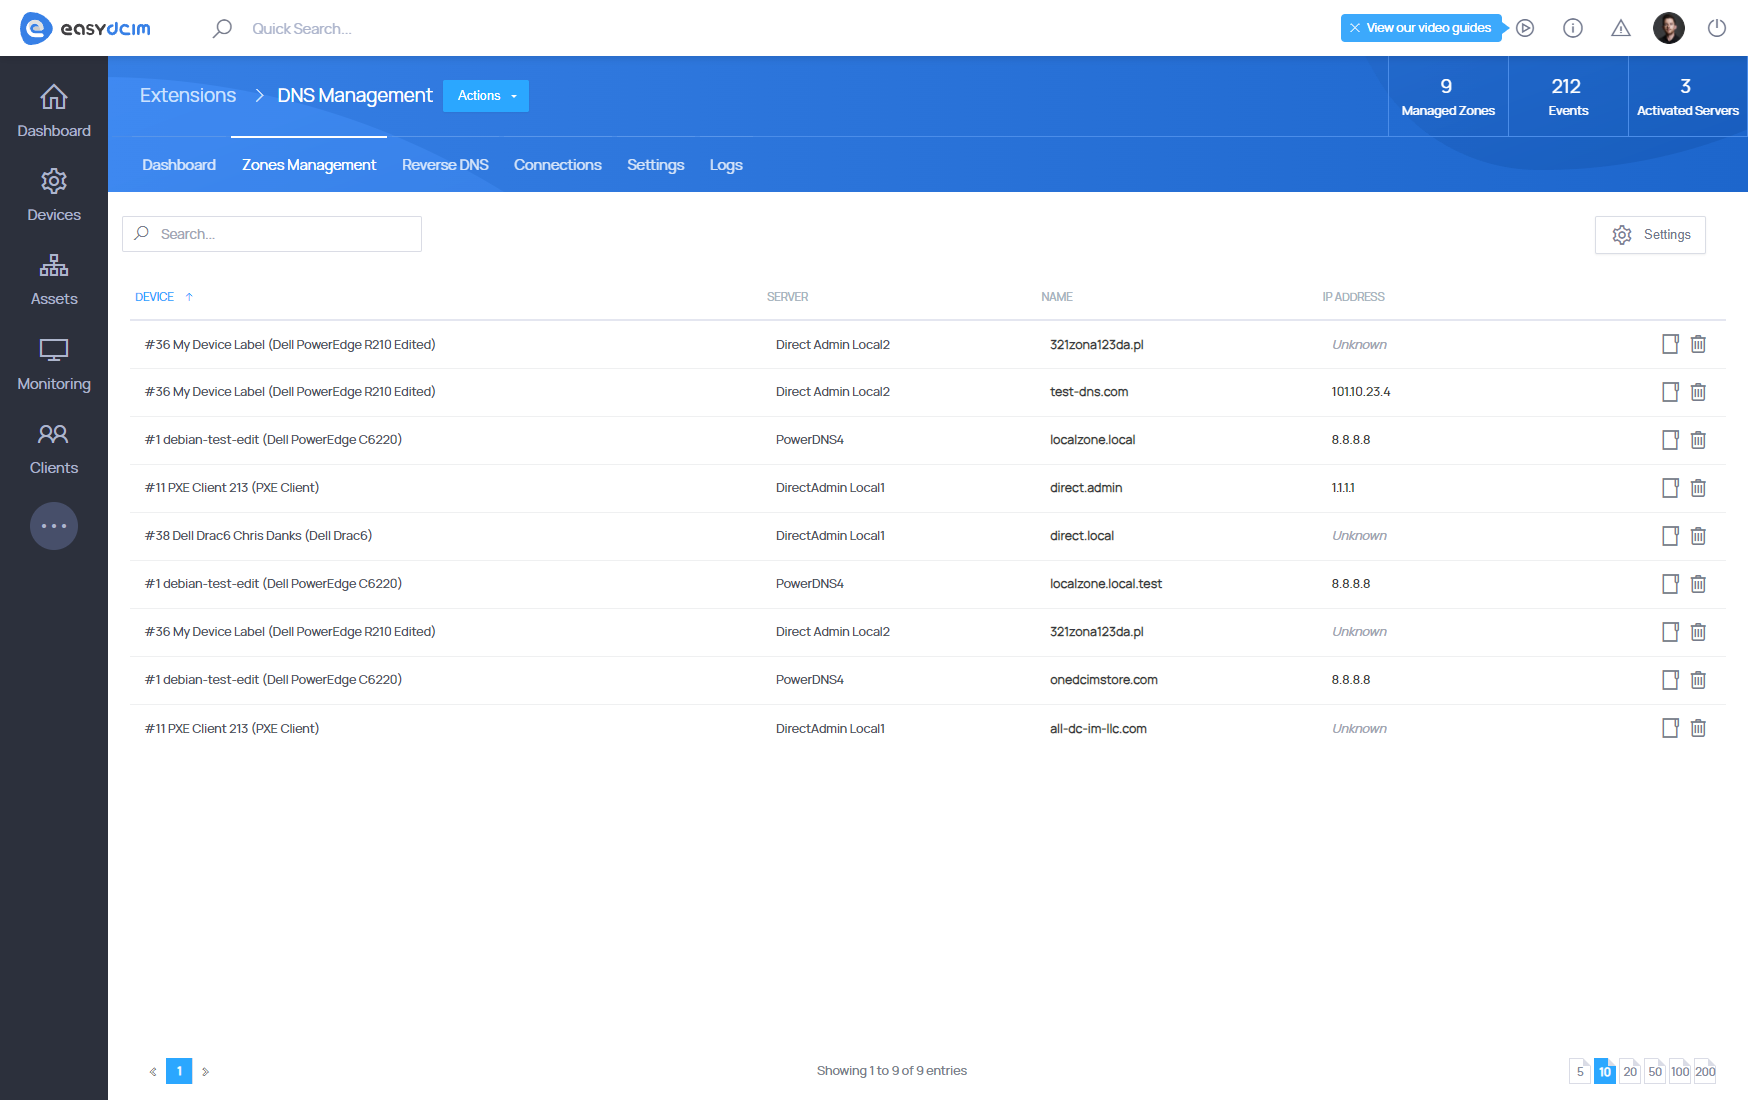
Importing DNS zones
The “Zones Management” section allows you to manage available DNS zones that have been added via EasyDCIM. In order to import a DNS zone and assign it to a device, select “Import Zone” from the action menu. The form contains following fields:
- Device - defines the device to which we want to assign an existing DNS zone
- Server - defines the connection from which we want to import the DNS zone
- Zone - defines the DNS zone that will be assigned to the device