IPMI Integration Extension
About
IPMI Integration For EasyDCIM extension allows to remotely control every single server configured in our system via IPMI protocol.
Features
- Control Servers Remotely - Power On/Off/Reset
- Configure IPMI Proxy
- Access Remote KVM Console
- Access Remote noVNC KVM Console
- View System Event Logs
- Overview Device Summary
- Check Detailed Information About BMC Plate
- Manage Access Permission For Administrators
- Supported Server Providers (KVM Console):
- AMI
- ASRockRack
- Ast2300
- Ast2050
- Dell DRAC 9
- Dell DRAC 8
- Dell DRAC 7
- Dell DRAC 6 (Remote Login Panel Only)
- Dell DRAC 5
- Dell DRAC 2
- Dell DRAC 1
- HP iLO 5
- HP iLO 4
- HP iLO 3
- Huawei iBMC 5
- Inspur
- Lenovo ThinkSystem (TSM)
- Quanta BMC
- Supermicro
- Supported Server Providers (HTML5 Console):
- Dell iDRAC 9
IPMI configuration
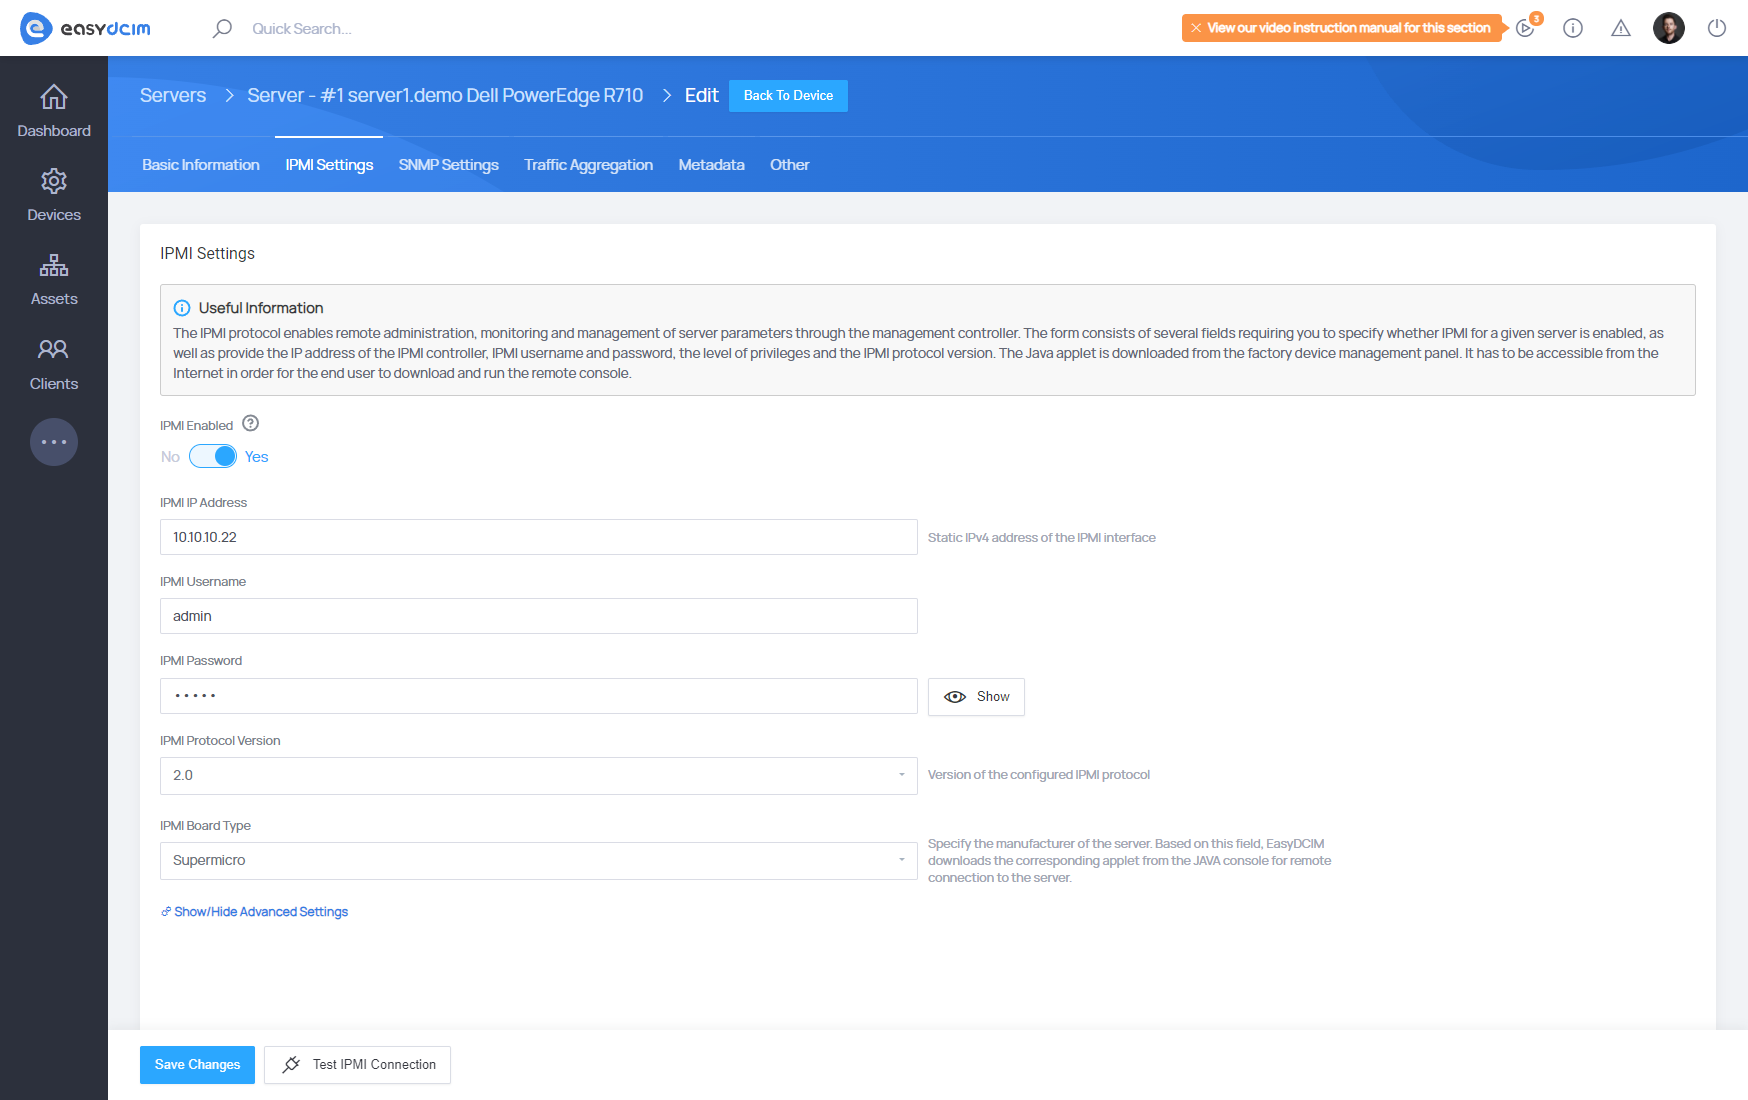
To configure the connection to IPMI, select ‘Edit’ from the ‘Actions’ menu located in the server summary view. The setup form has several tabs, in this case, you have to choose ‘IPMI Settings’.
The form consists of several fields requiring you to specify whether IPMI for a given server is enabled, as well as provide the IP address of the IPMI controller, IPMI username and password, the level of privileges and the IPMI protocol version.
The ‘IPMI Board Type’ field shall specify the manufacturer of the server. Based on this field, EasyDCIM downloads the corresponding applet from the JAVA console for remote connection to the server. The default value of the IPMI Port(UDP) field is 623, while the IPMI Remote Console Port field indicates an additional port on which the remote console operates.
Once the form has been filled out and changes saved, you can now test the typed in data. To do so, press the ‘Test IPMI Connection’ button and the system will check the validity of the IPMI connection.
- IPMI Enabled - define whether the IPMI connection should be enabled for this device
- IPMI IP Address - static IPv4 address of the IPMI interface
- IPMI Username - provide your IPMI username
- IPMI Password - enter your IPMI password
- IPMI Protocol Version - the protocol version for most devices is 2.0
- IPMI Board Type - specify the manufacturer of the server. Based on this field, EasyDCIM downloads the corresponding applet from the JAVA console for remote connection to the server.
In most cases, this configuration is sufficient for the IPMI connection. The form also has fields for advanced users:
- IPMI Privilege Level - privilege levels determine which IPMI commands a user can execute over a channel
- IPMI Proxy Server - a proxy server used for IPMI connections. By default, it is the proxy server used by the location of this device.
- IPMI Port (UDP) - assign the port for the ipmitool command, 623 as default
- IPMI Timeout - specify timeout for lanplus interface, 1 second as default
- IPMI Remote Console Port - used along with applet download for Java Console. Default ports: 443 or 80, depending on the hardware manufacturer.
- IPMI Remote Console Login URL - by default, it is the IPMI IP Address. Fill in only if the factory management panel is different from the IP address of the device.
- IPMI KVM Remote Port - KVM Console Redirection Port, default: 5900
- IPMI Additional Arguments - additional arguments to be added to the “ipmitool” command
IPMI proxy
Requirements
To use the proxy server you need n configured remote agent. Also, the server should have access to the internal network in which the IPMI IP is located. We recommend installing the proxy software on a separate server (either virtual or dedicated). The proxy server can have both a public and private IP address, but it must be available from EasyDCIM. It is possible to configure proxy on the EasyDCIM server (local agent), but we advise against it since every time you are using a proxy server with third-party software installed, the risk of unauthorized access to the target server significantly rises. Finally, please keep in mind that proxy increases the load on the proxy server, consequently slowing down the application.
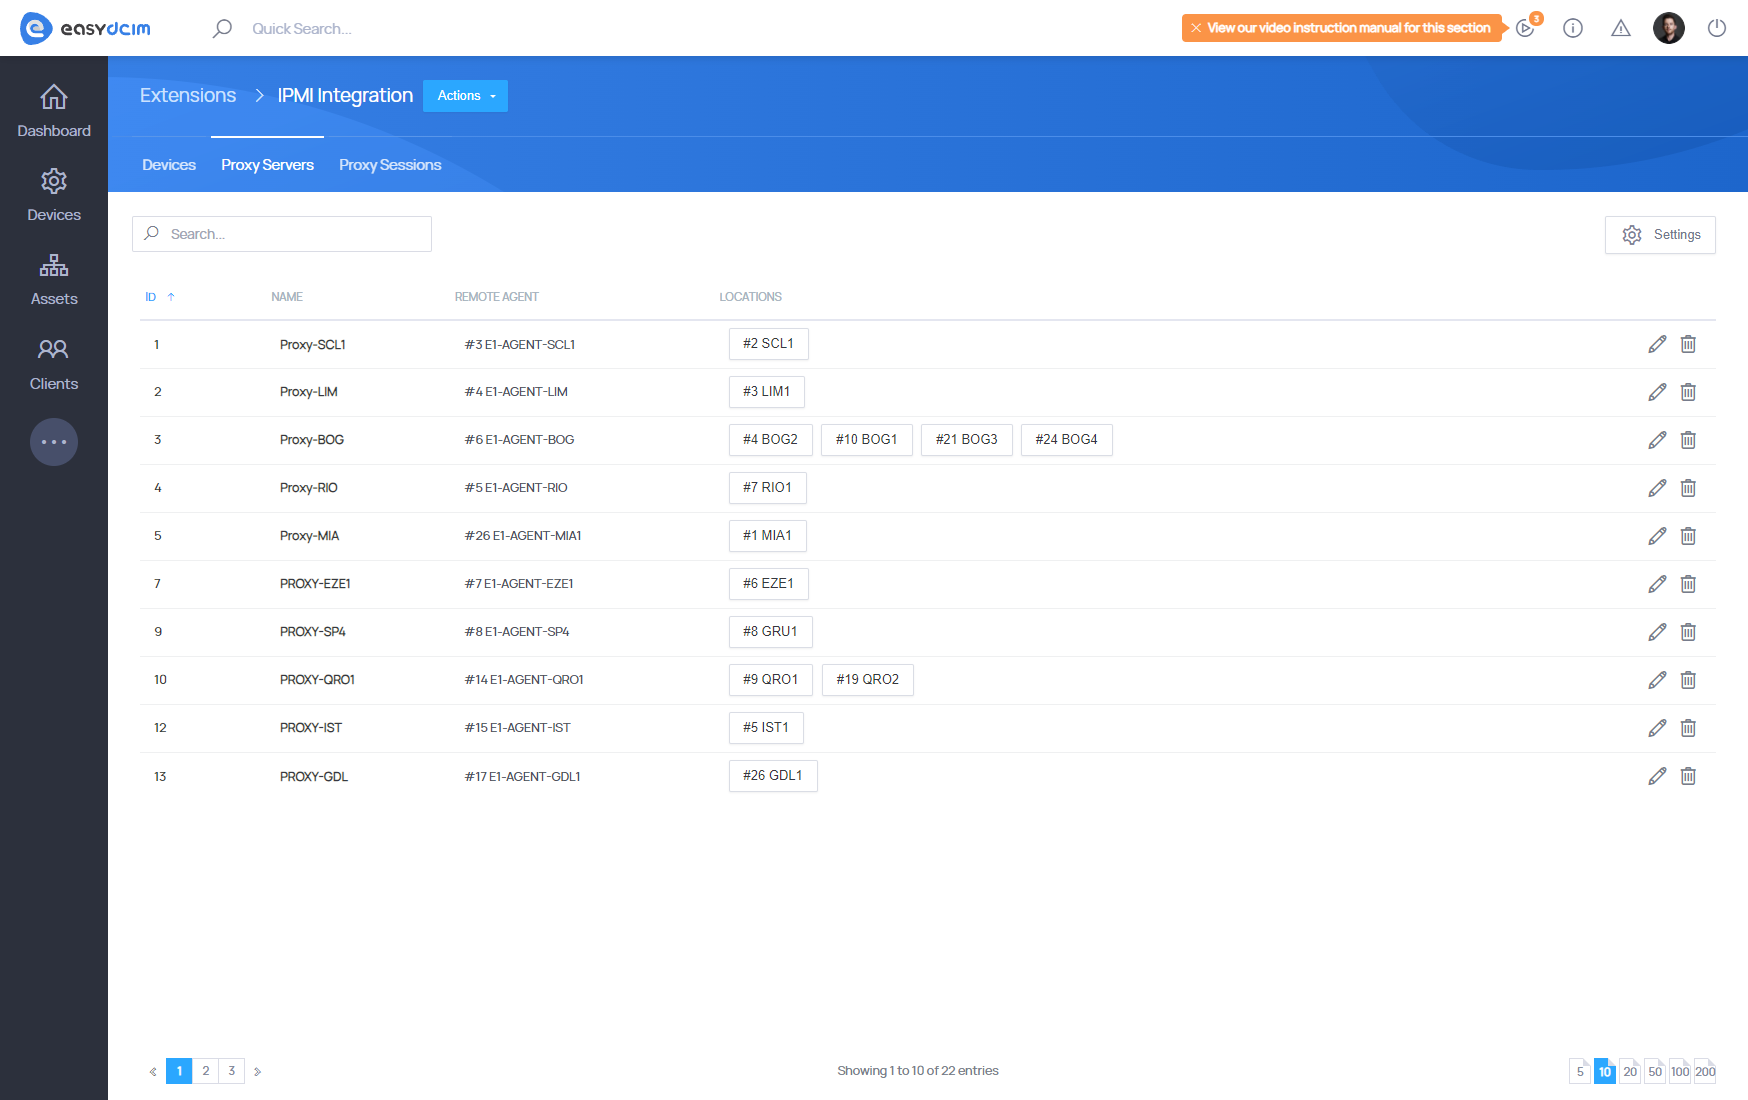
Principle of operation
The remote JAVA console is downloaded directly from the server manufacturer’s panel, using the specific CURL commands. Additionally, to download the JAVA console, you need a public address of the IPMI interface which may lead to unauthorized access. If such a situation occurs, you can create a proxy server for IPMI connections in the application that will serve as a gateway between the application and the end user. The proxy server also channels all IPMI commands such as device power-on, restart or power-off. Owing to such a solution, none of the IPMI interfaces requires a public IP address and all important operations can be carried out in a secure private data center network.
Extension at work
- The VNC server and the software required to display the IPMI interface and the remote console will be installed on the proxy server.
- The webockify server, which redirects traffic to the VNC server and back, will start on the server with EasyDCIM.
- noVNC, which refers to websockify locally and gets an image with the IPMI interface in the browser through the VNC server will be launched on the server with EasyDCIM.
On the EasyDCIM server, you must allow incoming traffic for the port range from 6081 to 6200.
The following operations are performed on the proxy server:
- Creates a new user called easydcim_vnc_X to be able to start the VNC server
- Installs the necessary system packages (chromium, java etc.)
- Creates an exception file for Java
- Downloading a JAVA console via the remote agent or launching a factory IPMI panel
- Creating a connection between EasyDCIM and the VNC server
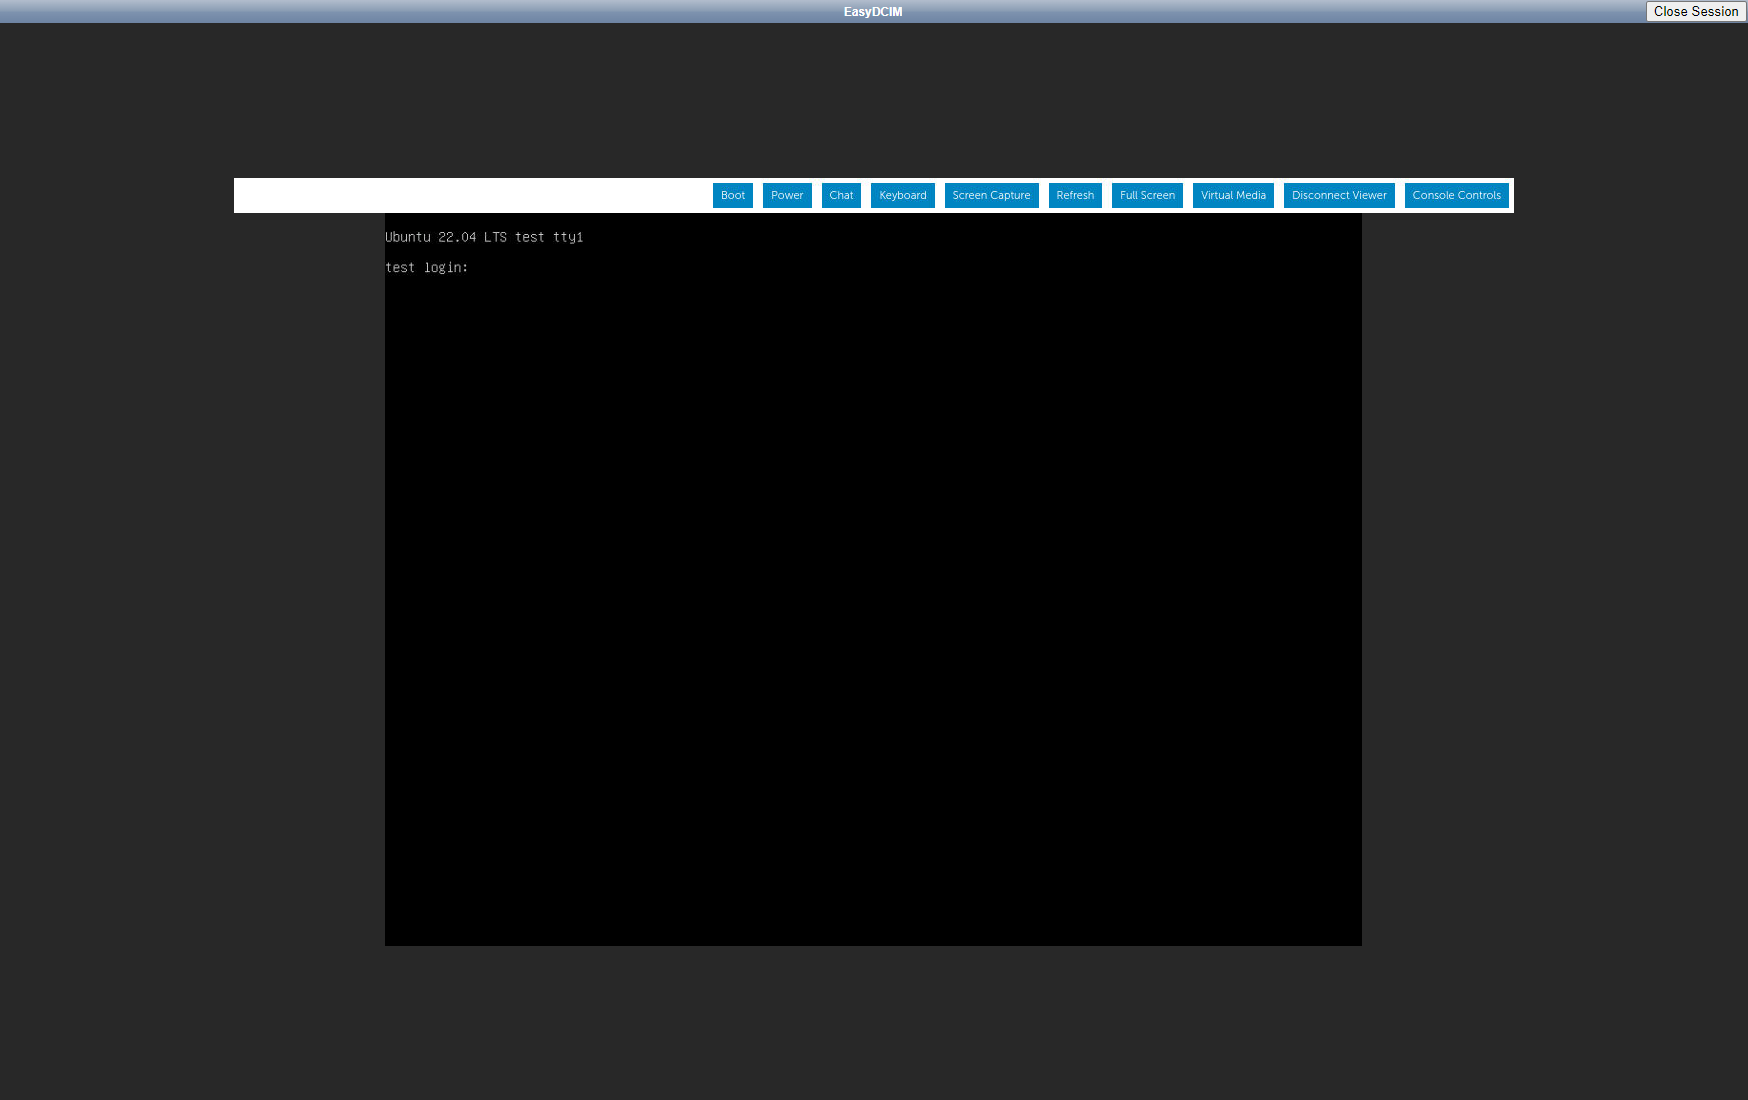
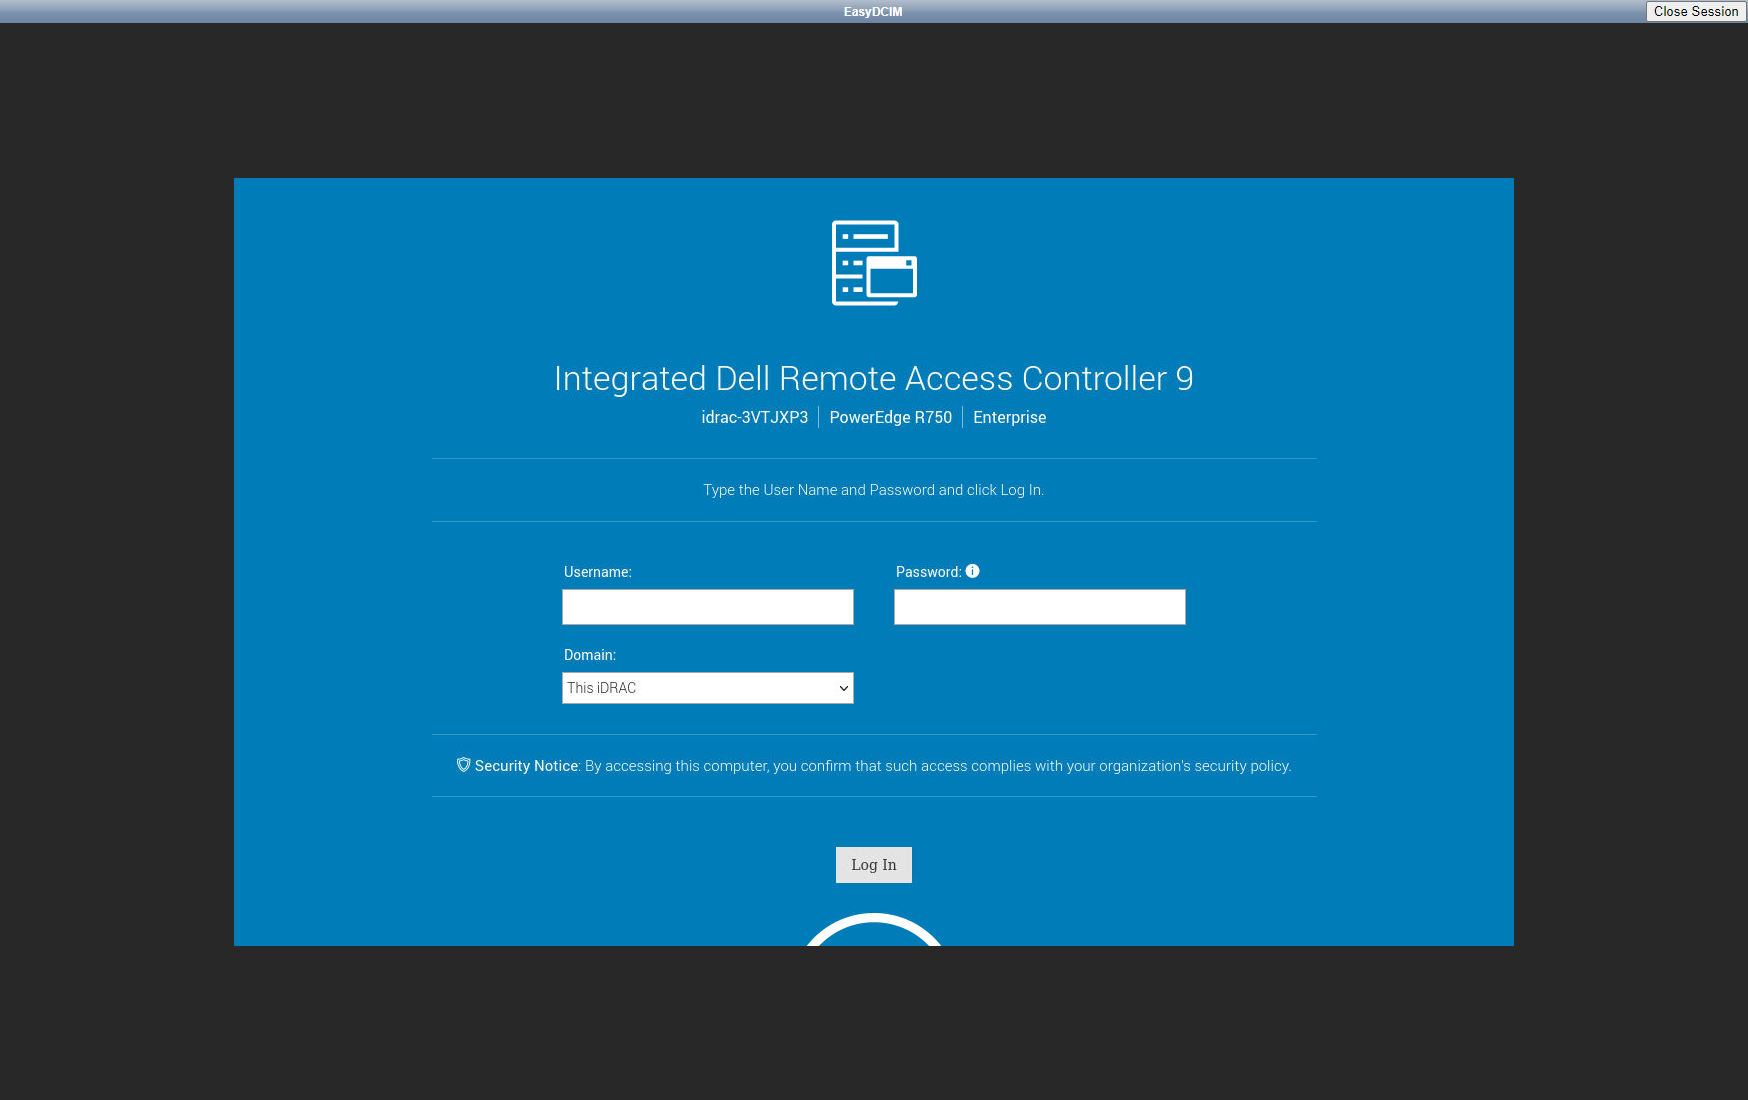
VNC session with downloaded JAVA console:
VNC session with IPMI manufacturer’s factory panel. You can use the “Send Login” and “Send Password” buttons to send your IPMI login and password to the login form.
Security
The proxy server uses a range of ports to establish a connection between VNC and EasyDCIM.
The range of ports used by a proxy server:
- start port: 5901
- end port: 6000
The range of ports used by a EasyDCIM server:
- start port: 6081
- end port: 6200
Please remember that access to these ports must be public.
Remote device management
The extension grants to the options to remotely turn off, turn on and restart the device with IPMI protocol support. If you want to perform one of these actions, simply move to summary section of the device. If IPMI Integration extension is active then in the header, next to the Actions button, you will have an opportunity to control the device remotely.
To perform a demanded action, please choose it from Power Control list as available.
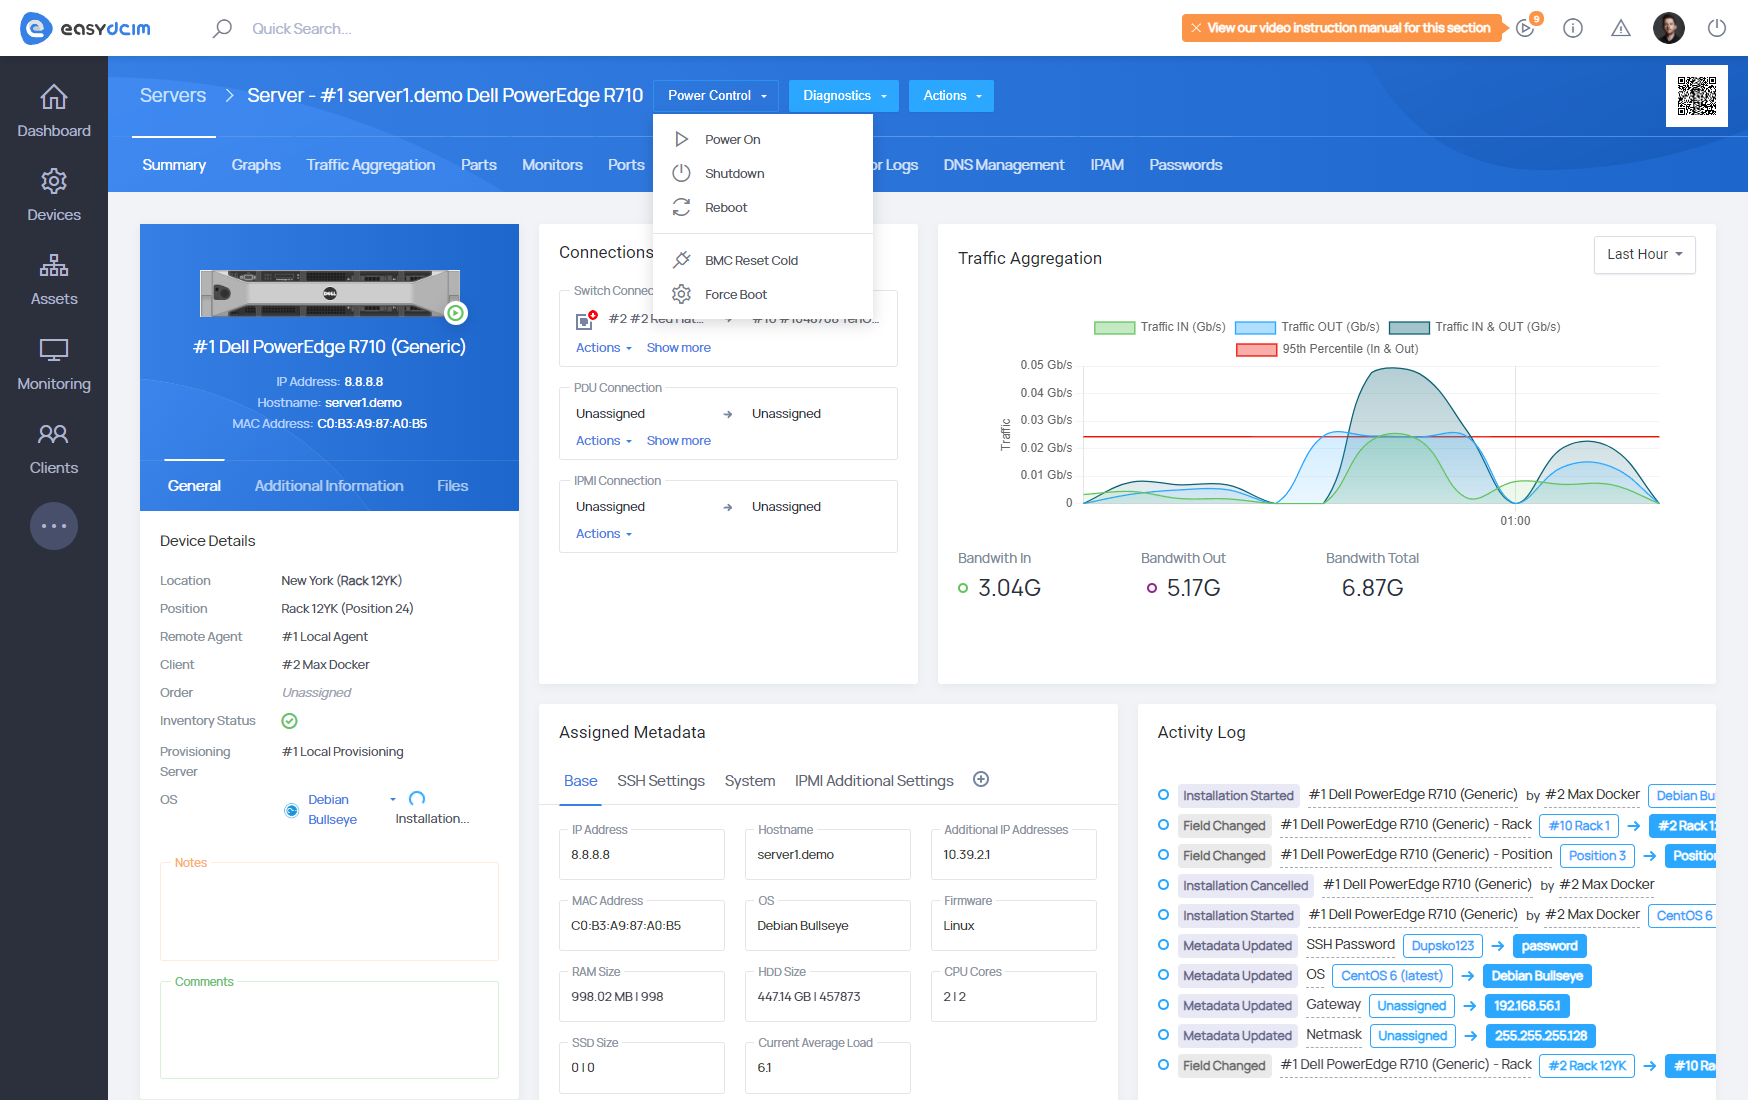
Executing commands for the particular actions:
- Power On
- Power Shutdown
- Power Reboot
- BMC Reset Cold
- Force Boot
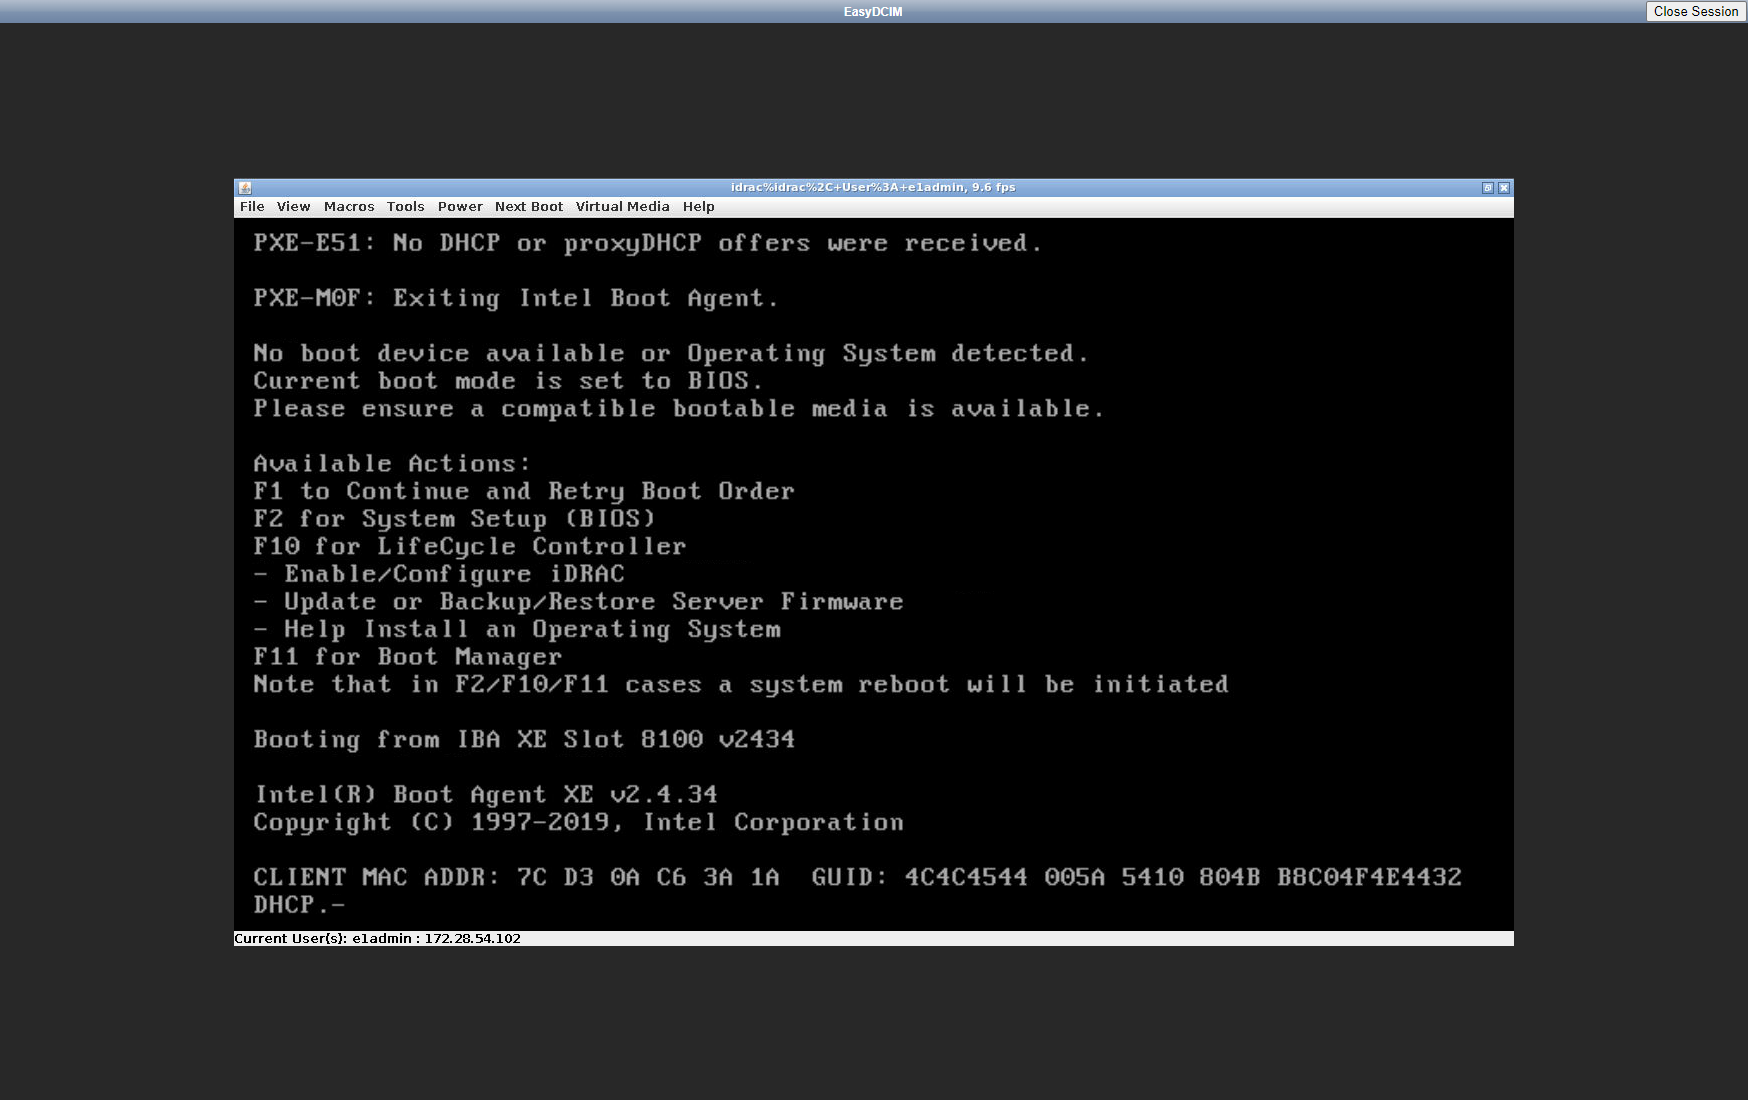
JAVA KVM console
Most companies offer the remote console as a Java applet. Our system supports downloading a remote console for devices with Supermicro, Dell Drac and many more. The Java applet is downloaded from the factory device management panel. It has to be accessible from the Internet in order for the end user to download and run the remote console.
When it comes to the console operation, the most important configuration field is ‘IPMI Board Type’, where you specify the type of the IPMI board for a given device. On this basis, our system selects the appropriate script used to download the JAVA applet from the device management panel.
To download the Java applet, go to the device summary view and find a widget containing the button for the remote console download. The Java applet will be automatically downloaded and launched after you click on the ‘Launch Console’ button.
noVNC console
A noVNC session is created dynamically using the appropriate IPMI Proxy server for the given location. IPMI Proxy servers can be created within the ‘IPMI Integration’ extension. The IPMI Proxy server can be compared to the gateway between the private IPMI subnet and the end client that will use the KVM console. Once the JAVA console applet is downloaded to the remote agent server, EasyDCIM will create a VNC session that sends the image from the proxy server’s virtual screen to the end user. You can read more about the IPMI Proxy server in the IPMI Proxy section.