Assigning Servers
Assigning devices to locations and racks
Assigning the server to the location and the appropriate position in the rack allows you to better deploy the devices in the data center.
In order to assign a server to a location, select ‘Edit’ from the ‘Actions’ menu located in the summary view of the server. The edit form contains several tabs, in this case, you have to access the ‘Location & Client’ settings. In the ‘Location’ field, select the appropriate location for the server.
Next, enter the ‘Rack & Position’ tab to determine the assignment and position in the rack. The ‘Rack’ field displays the list of rack cabinets from the previously selected location. The ‘Device Size (Units)’ determines the size of the server that will be occupied in the rack. In the ‘In Rack Size’ field, specify the orientation of the server in the rack. The last element is the selection of the position in the rack. Please note that servers of a size larger than 1 are assigned to the next positions in the rack from top to bottom.
After saving the changes, you can move from the server summary view to the rack cabinet view. To do so, click on the previously set position in the ‘Device Details’ box.
Connecting devices to switches
Connecting the server to the switch is very important from the perspective of both the administrator and the end client. It enables monitoring of the traffic and transfer usage, which eventually will allow you to charge customers using the preferred billing system.
In order to assign the server to the switch, go to the ‘Ports’ section that presents the complete list of server ports. To add a new port, you need to enter the ‘Add New Port’ form where you have to define the label and number of a port.
After creating the port, connect it to the appropriate port of the switch. The ‘Connected Item’ and ‘Connected Port’ fields in the table are used for this purpose. In the first one, select the switch that you want to connect the server port to, then choose the appropriate switch port in the second field. That is all! The server port has been connected to the switch port.
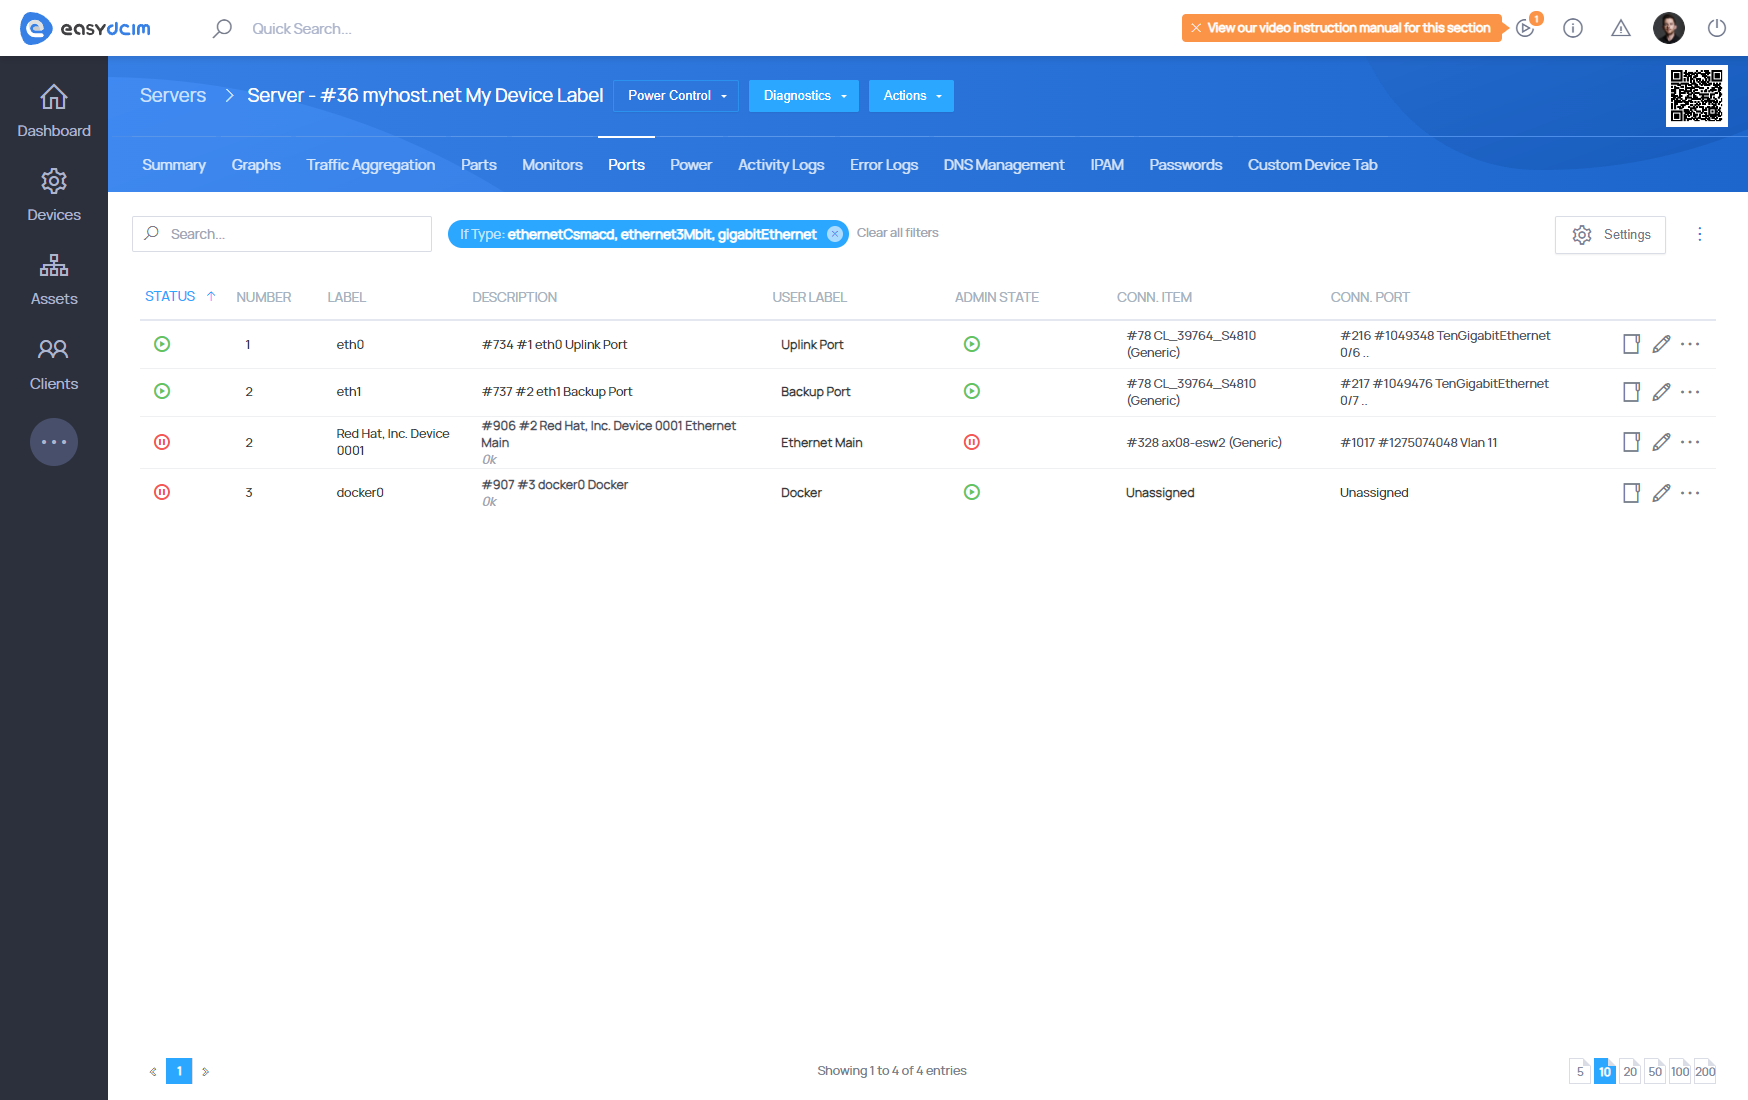
In order to monitor the transfer consumption and traffic on this server, go to ‘Traffic Aggregation’. In this section, you can specify ports that will be responsible for the traffic aggregation of this server. In most cases, it will be a single port, but the system permits you to assign an unlimited number of ports here. The ‘Configure’ button launches the port selection form, you simply select the appropriate server port and save the changes.
Such a configuration will allow you to collect traffic from the appropriate switch port that has been assigned to the corresponding server port.
Connecting devices to PDUs
Connecting the device to PDU will prove useful if you do not have access to the IPMI configuration because it will allow you to remotely manage the status of a device.
In order to assign a device to the PDU, move to the ‘Power’ section that presents the list of power supply ports for the selected device. To add a new port, enter the ‘Add New Port’ form and fill in the required fields: the port label and number.
After the port has been created, you need to connect it to the appropriate PDU’s power outlet. To do so, complete the ‘Connected Item’ and ‘Connected Port’ fields located in the table. You will have to choose the PDU that you want to connect the power socket to and select the appropriate PDU outlet.
The presented settings will allow you to remotely start, reboot or shut down the device using the ‘Power Control’ action in the device summary view.
Assigning servers to clients
Dedicated servers can be allocated to clients to allow their easy management either directly through the EasyDICM platform or via an external billing system. To enable an end client to manage a dedicated server, a corresponding order must be created first. The entire ordering process is described in detail in the “Creating New Order” section.
When creating an order, you need to:
- Select a client to manage the dedicated server.
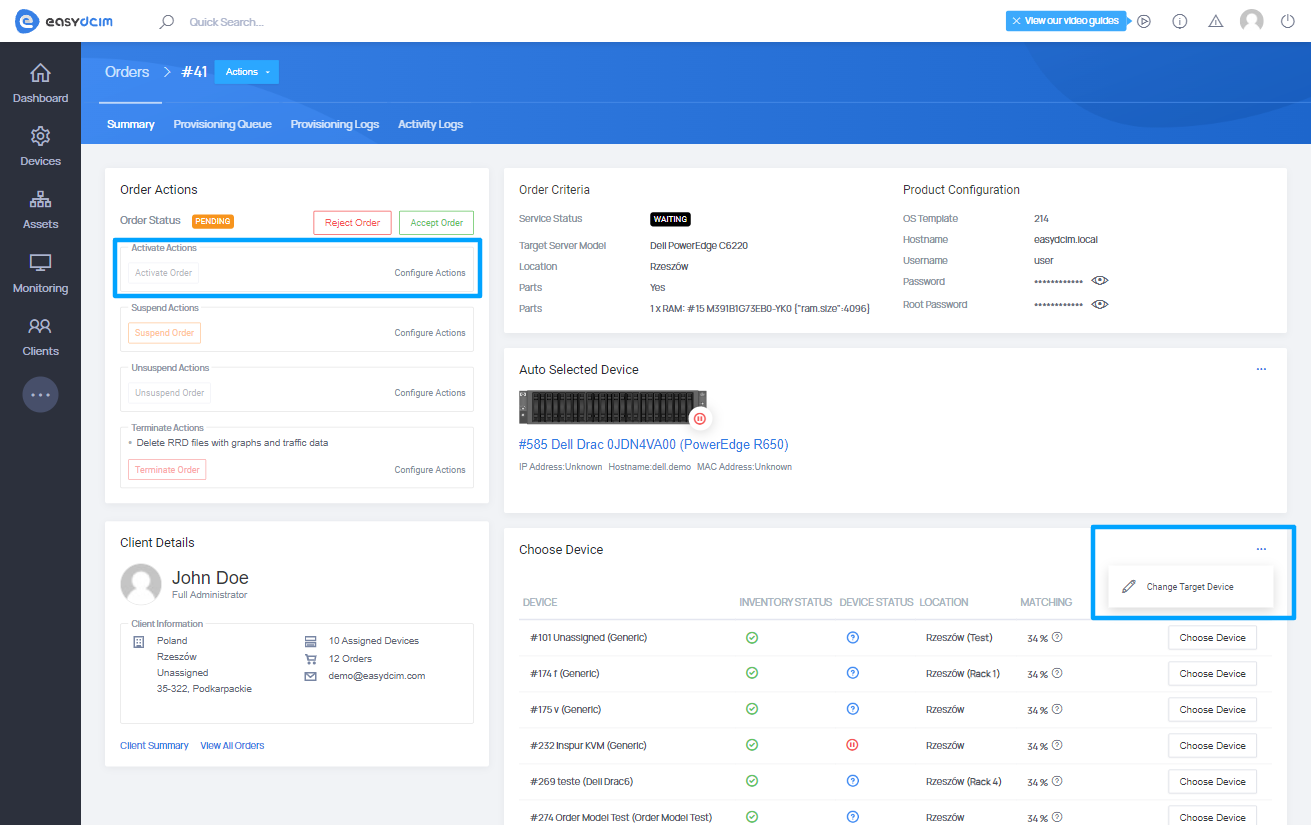
- Select the appropriate server using the option: “Change Target Device” in the order summary view.
- Accept the order and activate the service.
When activating the service, the system can perform a number of additional actions. If you do not want to perform any additional actions on the dedicated server, you have to remove all the default actions. It can be done in the order summary view → “Activate Actions” box located on the left side.
Once all the preceding steps are complete, the end client will be able to remotely manage the server by performing various actions, including:
- Reinstall the operating system,
- Execute the boot/reboot/shutdown actions,
- Access KVM console in a noVNC session,
- Monitor the outgoing and incoming transfer usage.
Assigning parts to devices
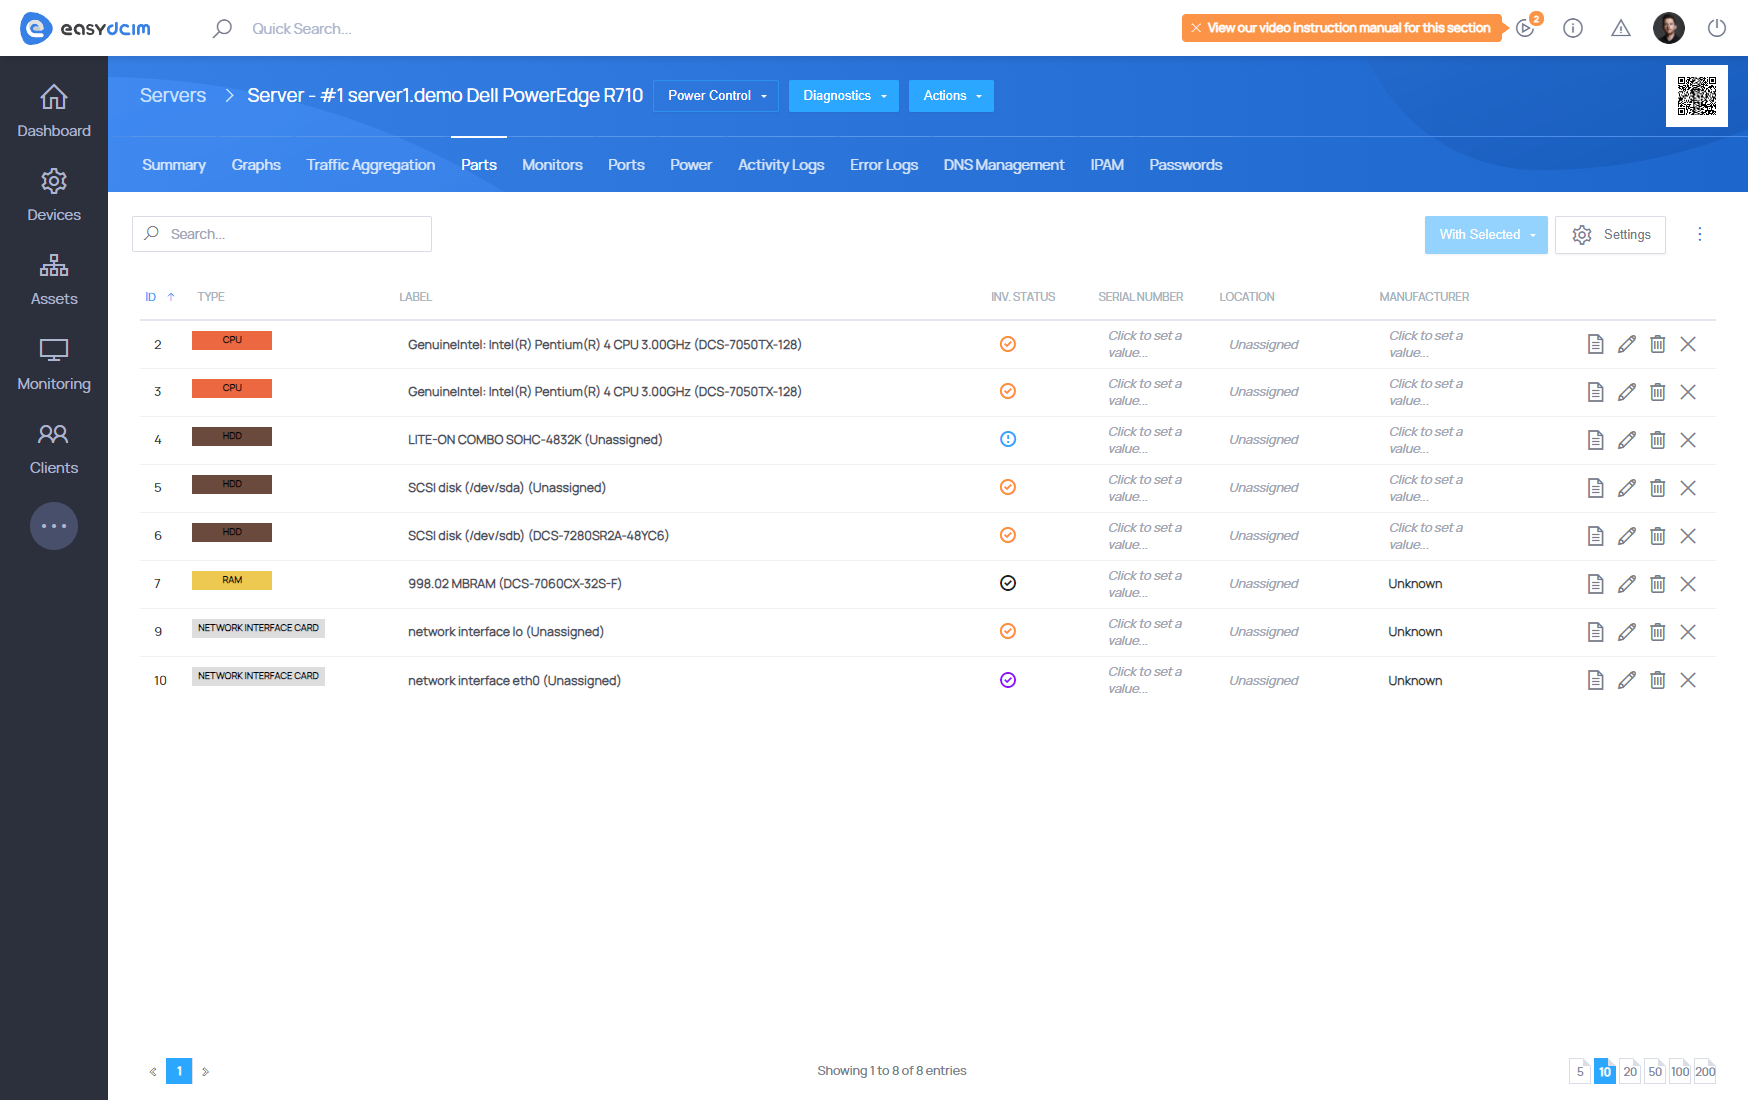
Each server contains base components, such as CPU, RAM, hard drive and motherboard. In order to manage your inventory in the data center more efficiently, you need to assign the appropriate parts to the servers. Each part of the server is a single item with unique properties.
In order to add a new item to the system and automatically assign it to your device, the best option is to go to the ‘Parts’ section in the device’s summary view and then select ‘Quick Create Part’. The form will allow you to specify such data as the type of the item in the ‘Select Part Type’ field and its model in the ‘Select or Create Part Model’ field, as well as indicate the label and serial number. Additionally, you can define how many parts you want to create and assign to the device in the ‘Quantity box’. All added items are listed in the ‘Search Inventory’ list accessible in the ‘Infrastructure’ section.
Parts can be freely unassigned, upon which they will change the status in the inventory from ‘In Use’ to ‘Available’. This is designed to enable the use of a particular part in another device.
You can also completely remove the part from the system. This solution should be used if the part is no longer located in your data center and you do not want to use it in the future.