VLANs
VLANs management
A VLAN is a logically separated network of devices within a different, larger physical network. Devices that create a VLAN, regardless of their physical location, can freely communicate with each other and, at the same time, are separated from other VLANs. The communication between devices belonging to two different VLANs is not possible at the switch level. VLANs are configured in switches, ISO / OSI Layer 2 network devices. A VLAN is identified by an integer number.
Supported devices
The physical ports of a switch can be logically combined into one or more VLANs. The use of VLAN is possible for all supported switch types. You can check the list of supported switches here: Supported Devices
For the proper operation, the Switch Management module is required.
Automatic VLAN detection
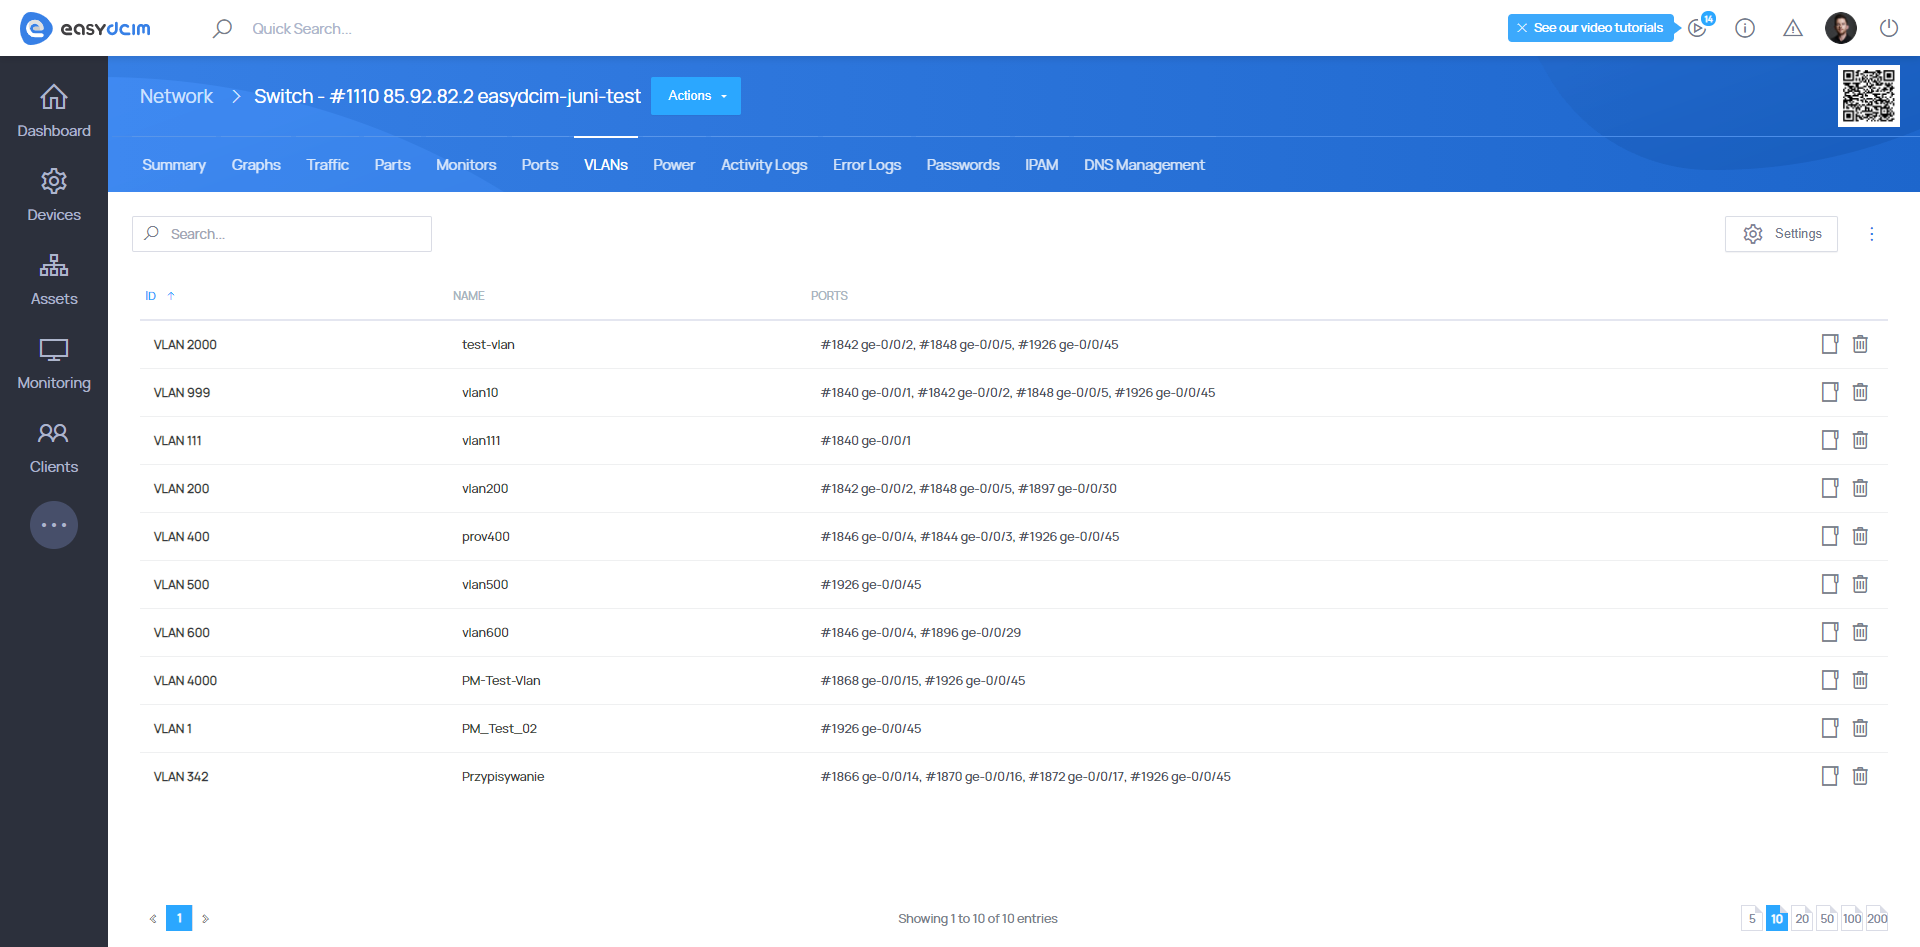
EasyDCIM is equipped with the VLAN detection mechanism on network devices. Obviously, this function is available only for supported network devices. The list of detected VLANs can be found in the VLANs section of the network device summary view.
Create VLANs
The VLANs section grants you the possibility to create VLANs on the switch. This operation is carried out with the use of an appropriate protocol that is available for a given network device. For example, network devices with the JUNOS system are supported via the NETCONF protocol. To create a new VLAN, select the Add VLAN option.
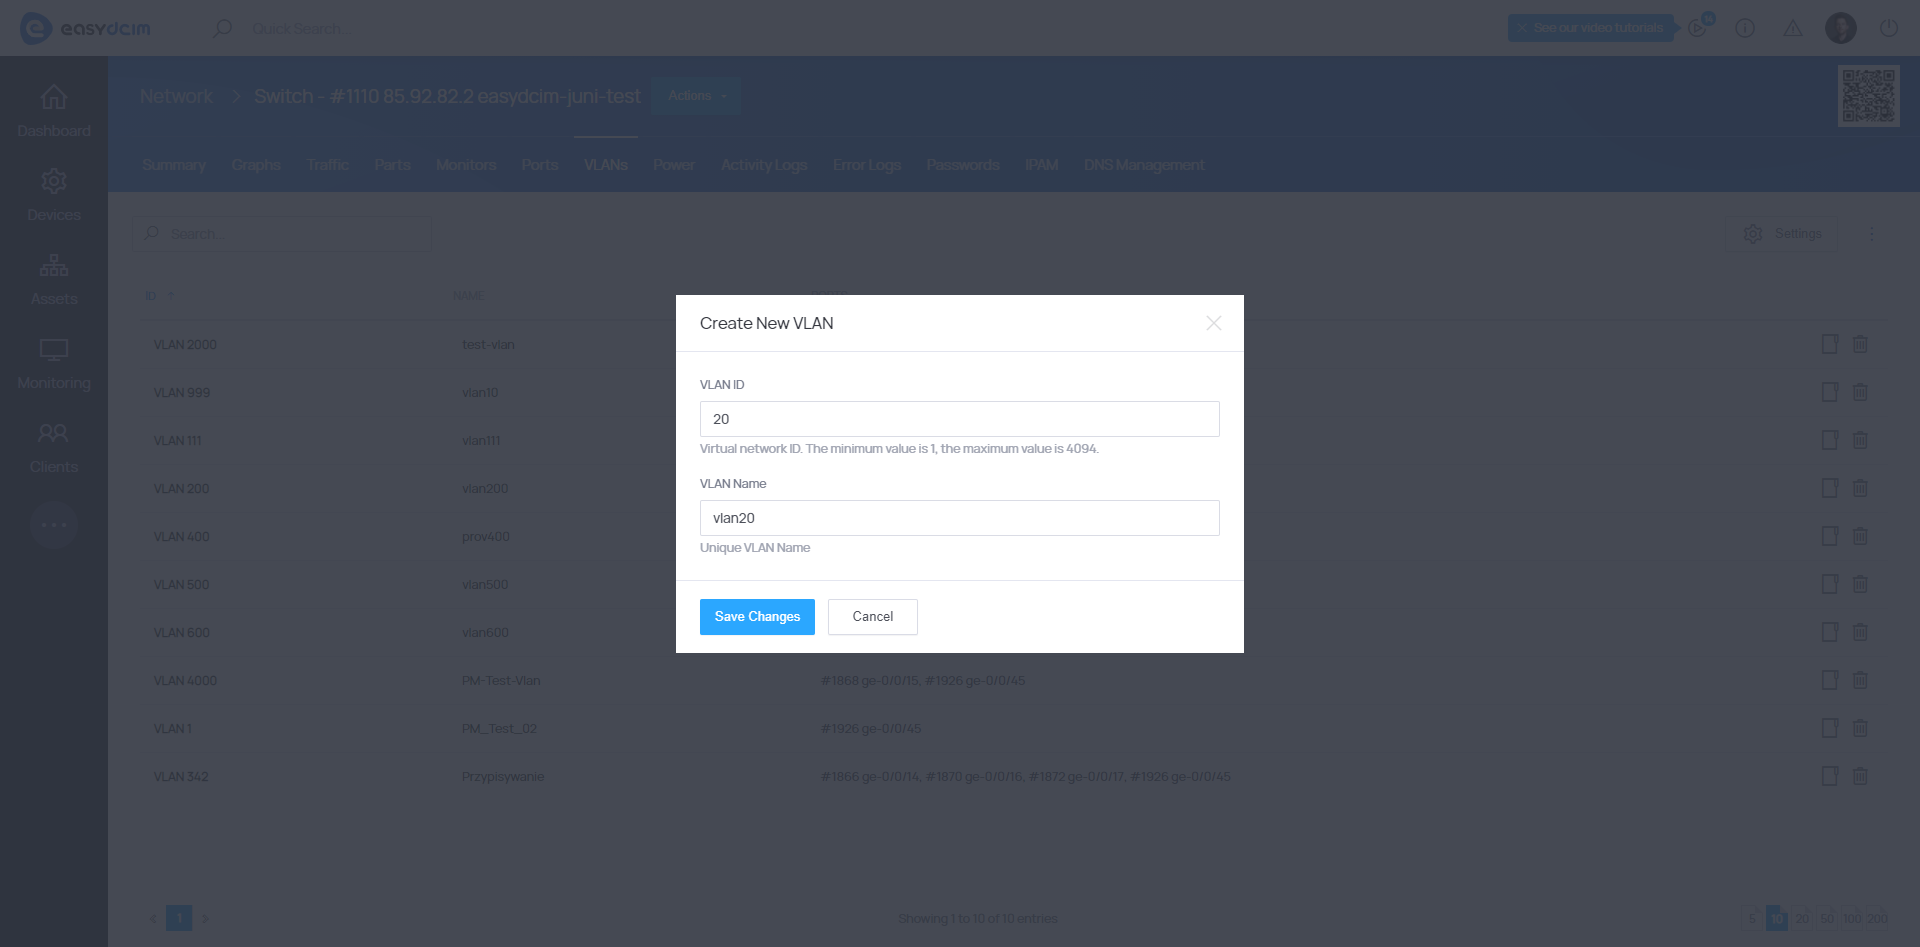
The Add VLAN form contains the required options, such as:
- VLAN ID - Virtual network identifier. The minimum value is 1, the maximum value is 4094.
- VLAN Name - Unique VLAN name. No special characters. The value can be validated by a switch.
A VLAN will be automatically added on the network device as well as in EasyDCIM.
Change VLAN settings
It is not possible to edit VLANs by changing VLAN ID or VLAN Name. If you want to modify these values, you have to do it from your network device. Changes will be automatically added to EasyDCIM during the next device polling process. This operation should take up to 10 minutes.
Delete VLANs
A VLAN is deleted only from EasyDCIM during the removal process. No action will be performed on a switch. The process of the automatic VLAN deletion on the switch is very complex and limited by the corresponding operating system configured on the switch. EasyDCIM is not able to remove a VLAN from all assigned network ports. This operation must be done manually on the switch using the command line.
Assign VLAN to a network port
To assign a VLAN to a network port, proceed to the Ports section located in the network device summary view. Each network port has advanced actions depending on the driver type that supports a device. To assign a VLAN to a network port, select the appropriate port and then run the “VLAN Configuration” action. The form will be launched and data should be automatically downloaded basing on the switch settings. In the “VLANs port” field, you can specify a VLAN that will be assigned to the network port.
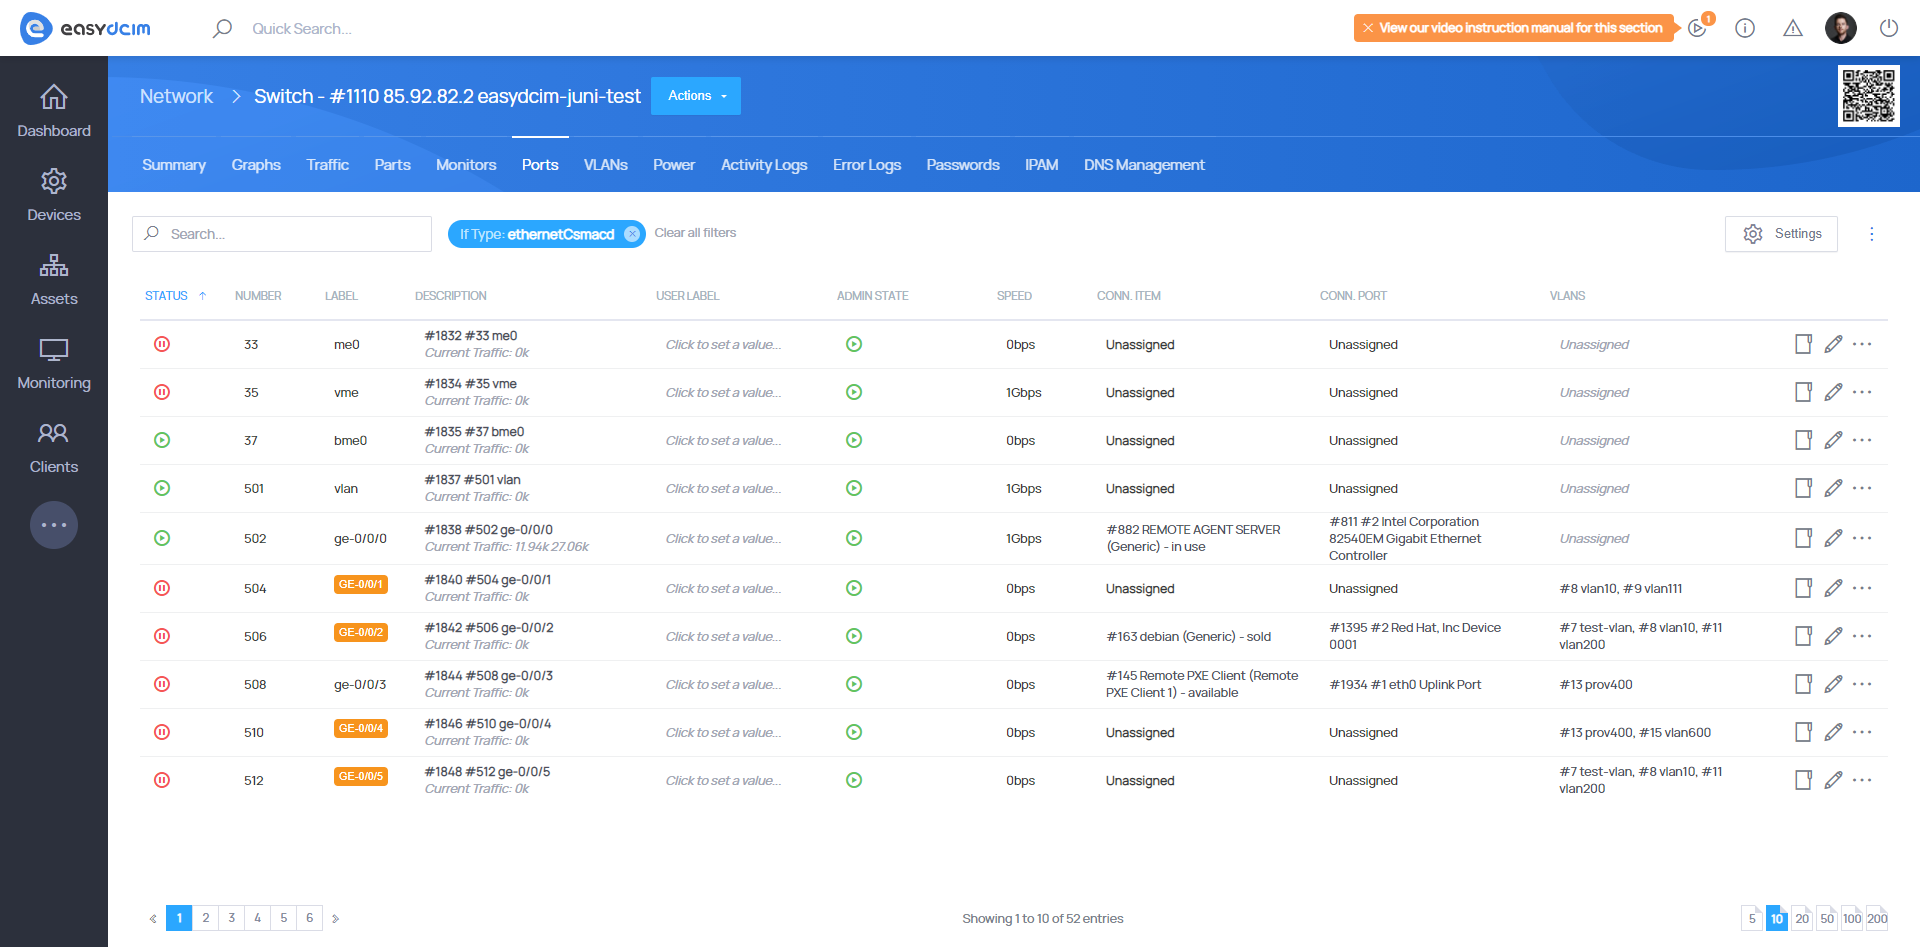
If you want to assign a few VLANs to one network port, you need to switch the network port to the TRUNK mode.
TRUNK port configuration
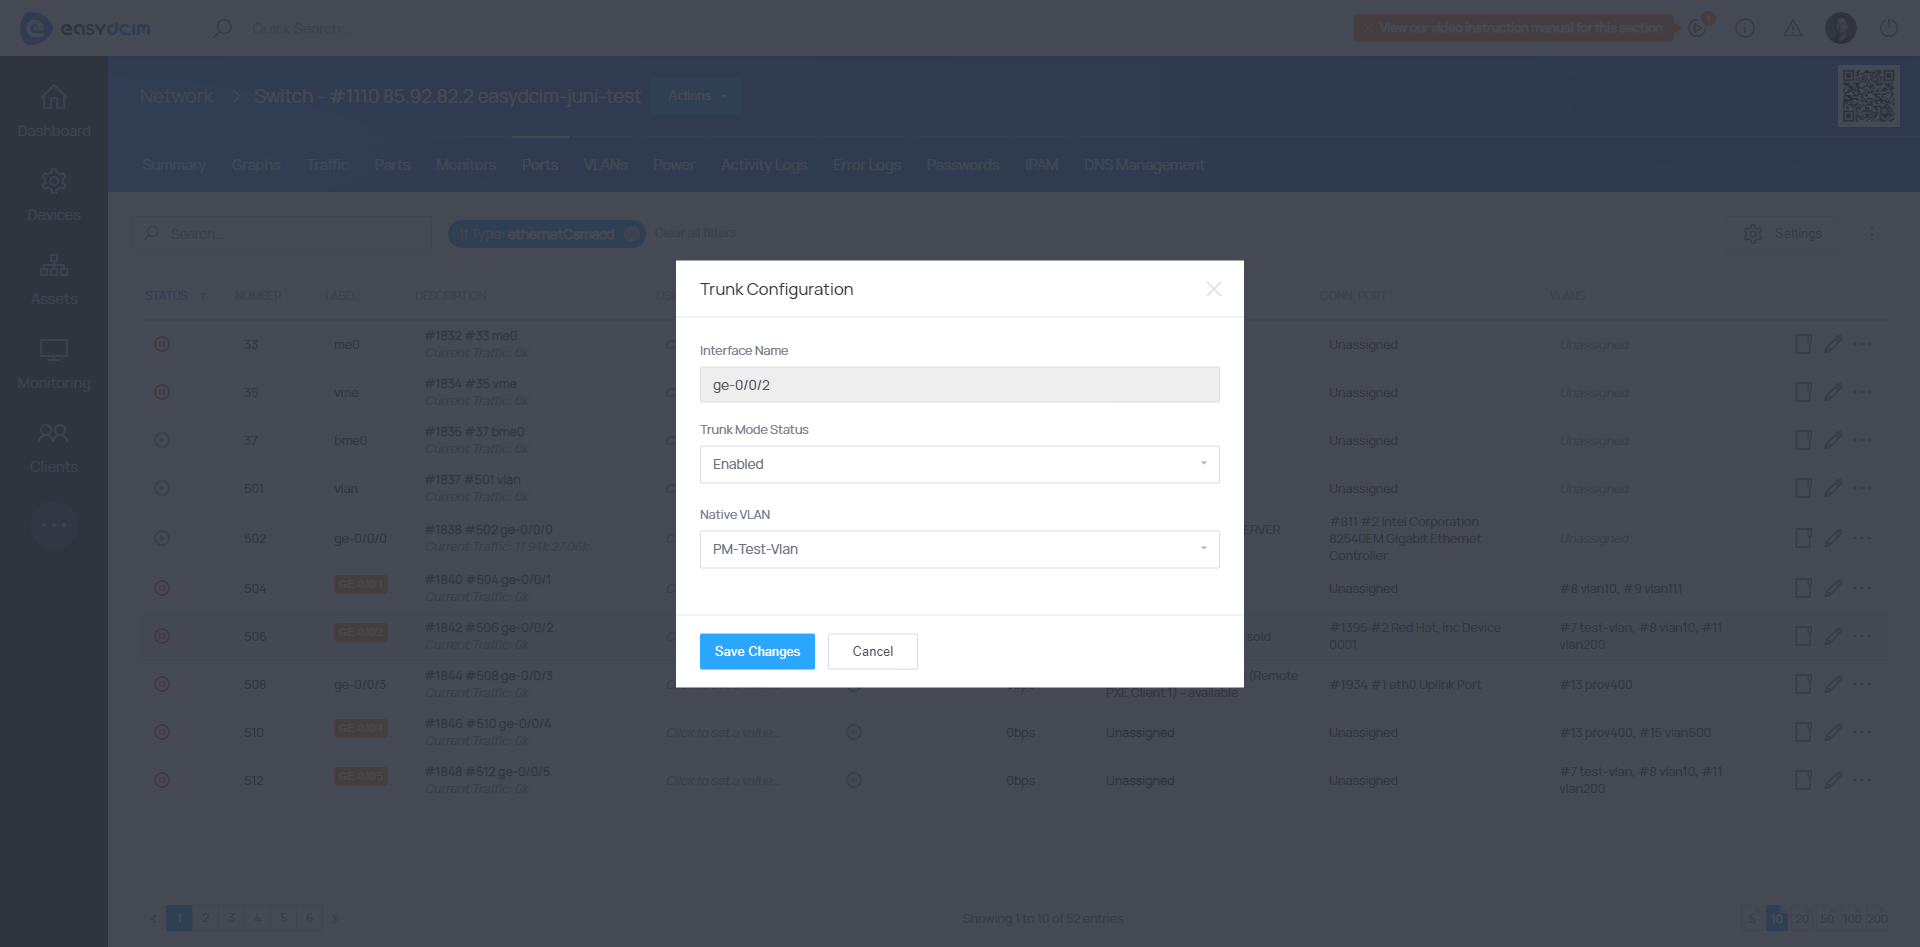
The TRUNK port is a single, physical link that can transport frames from multiple virtual networks. To configure the TRUNK option for a network port, select the appropriate port and then run the “TRUNK Configuration” action. The form will be launched and the data should be automatically downloaded basing on the switch settings.
The configuration form contains the following options:
- Trunk Mode Status - determines whether the port is in the Trunk or Access mode.
- Native VLAN - allows you to select a native VLAN (not required).
A native VLAN, sometimes called a primary VLAN, is a type of virtual network that supports so-called unmarked traffic, i.e. it sends frames that do not have a VLAN ID. Trunk lines, also known as 802.1Q, can handle traffic from different VLANs, marked traffic, tagged traffic but also traffic from outside VLANs. Once the data is saved, the attempt of changing port settings on the switch will start. The process may take up to a few seconds.