Adding New Server
In the system there are several options for adding a new server:
- add the device manually using the Add Device form (this option is recommended)
- add the device using the Discover Device
- add devices in bulk and import devices using the Mass Add Devices form
All the above methods have both advantages and disadvantages which will be described below in details.
Add Device form
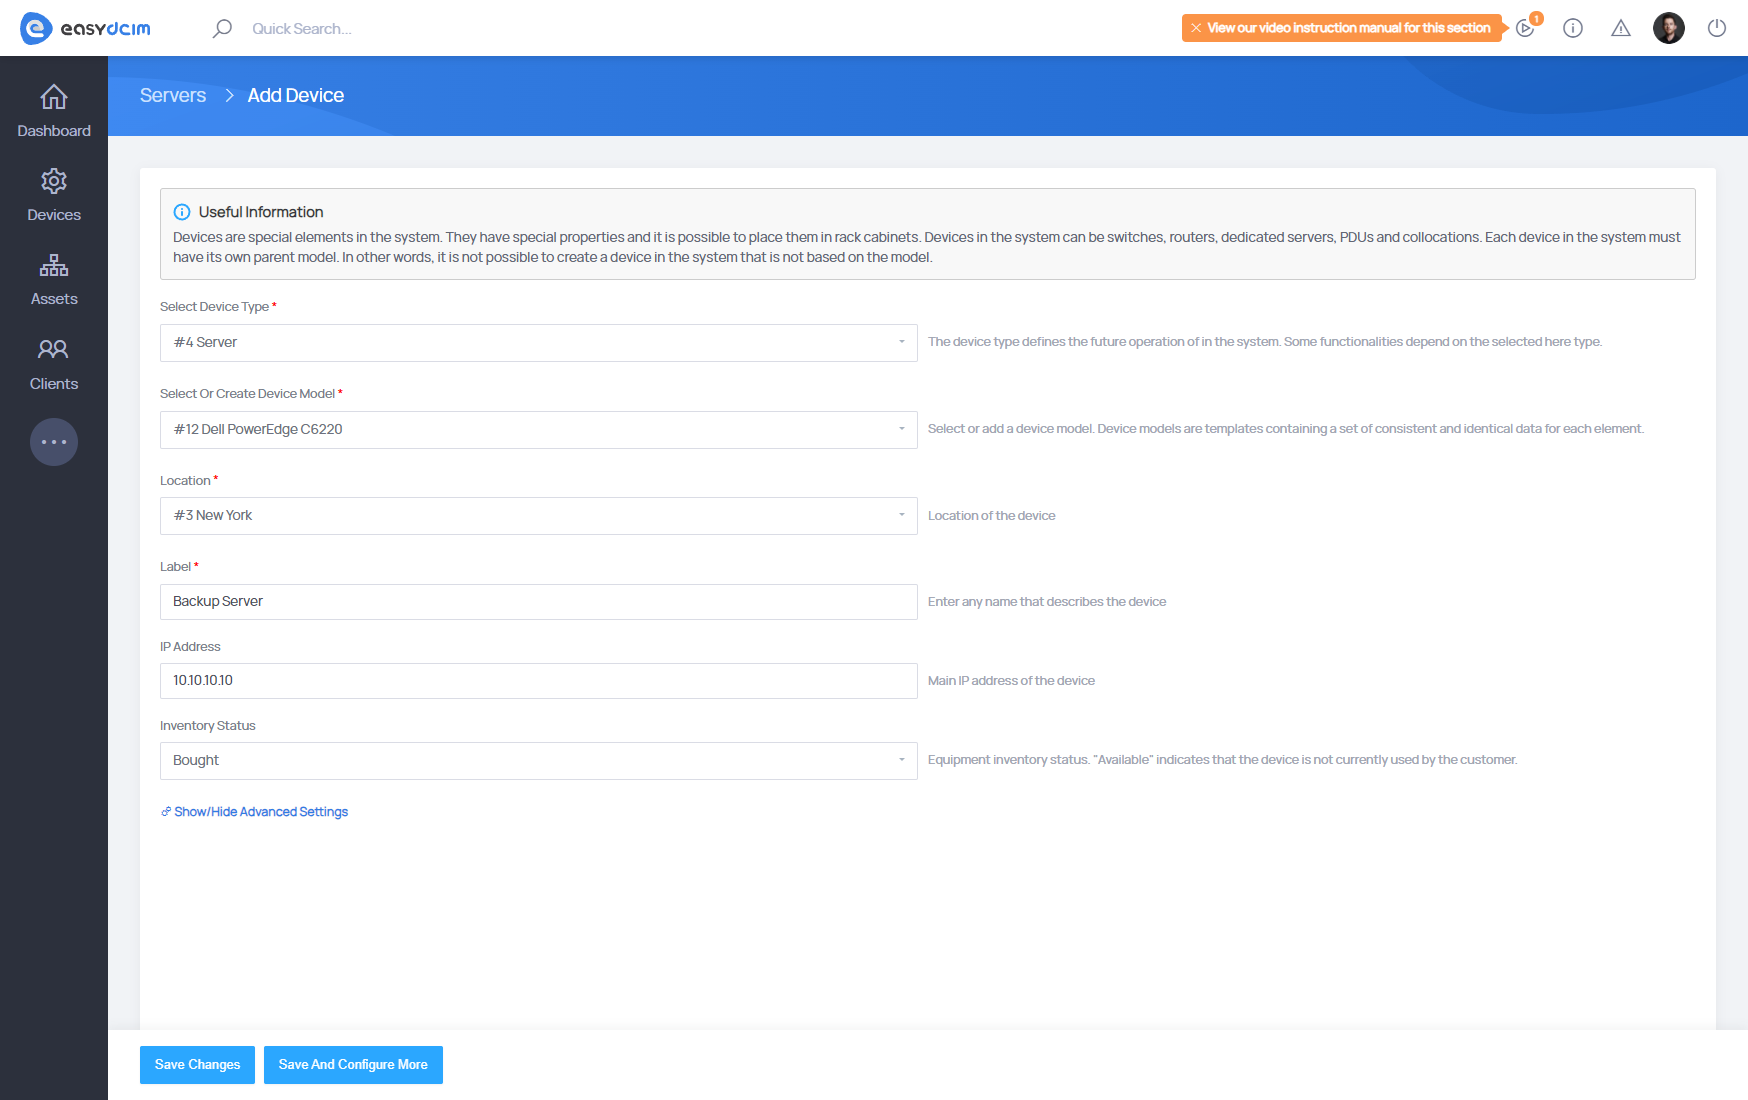
The Add Device form allows you to add a single server in your system and then configure the most important device data. This form is available in Devices → Add Device side menu.

In the first step, you can specify unique data for the device, such as:
- Select Device Type - specifies the device type, in this case “Server” or “Blade”
- Select or Create Device Model - specifies the device model, this can be an existing or a new server model
- Location - determines the location where the device is located, based on the selected location the server will be operated by an appropriate remote agent
- Label - any device label
- IP Address - the main IP address of the device. This is the IP address that will be assigned when the operating system is installed. It must be a unique IP address
- Inventory Status - determines the status of the server in the inventory
Additionally, we can specify data such as:
- Additional IP Addresses - additional IP addresses, these are the IP addresses that will be assigned during installation of the operating system as additional IP addresses of the main network interface of the server
- Firmware - device driver, EasyDCIM will in most cases automatically select the appropriate driver
- MAC Address - MAC address of the main network interface, based on this address the DHCP server will assign the appropriate IP address at the time of installation of the operating system
The “Save Changes” button will add the device to EasyDCIM and take you to the device summary page where you can proceed with further server configuration.
The “Save And Configure More” button will take you to the form with additional server information.
Discover Device form
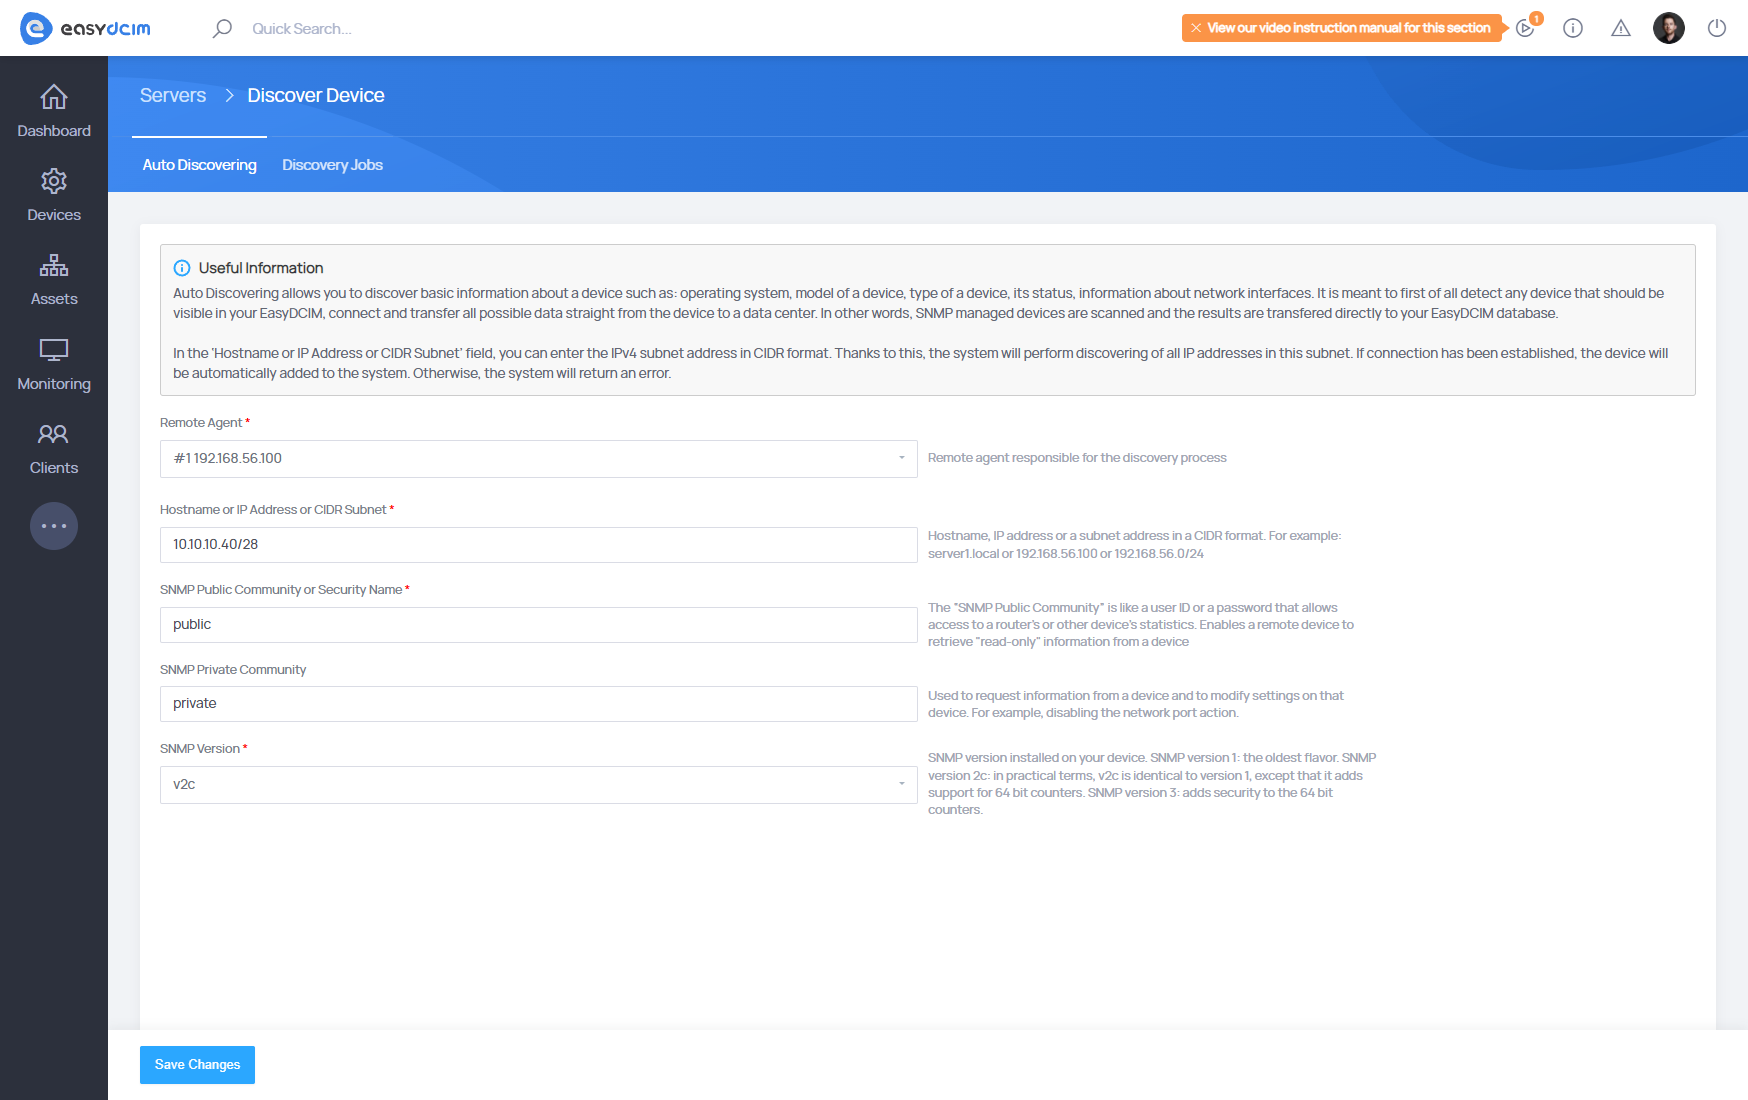
The Discover Device form allows you to add a server based on data retrieved using the SNMP protocol. Please note that this form is mainly useful for network devices such as switches and routers. In the case of servers, the data retrieved may not be accurate. This form is available from the side menu Devices → Auto Discovering.

In the first step, you can specify SNMP access credentials and also select a remote agent:
- Remote Agent - a remote agent responsible for connection via SNMP
- Hostname or IP Address or CIDR Subnet - IP address, hostname or a subnet address in the CIDR format
- In the cases of SNMP v1 or SNMP v2
- SNMP Public Community - a public SNMP community that should have read-only rights. Used in the process of retrieving data from SNMP
- SNMP Private Community - A private SNMP community that should have write rights. Used for processes such as: disabling and enabling network ports, disabling and enabling power outlets
- In the cases of SNMP v3
- The Security Name, SNMPv3 Security Level, SNMPv3 Authentication Protocol, SNMPv3 Authentication Pass Phrase, SNMPv3 Privacy Protocol, SNMPv3 Privacy Pass Phrase fields are specific fields for SNMP Version 3 configuration and must be completed according to your device’s SNMP settings.
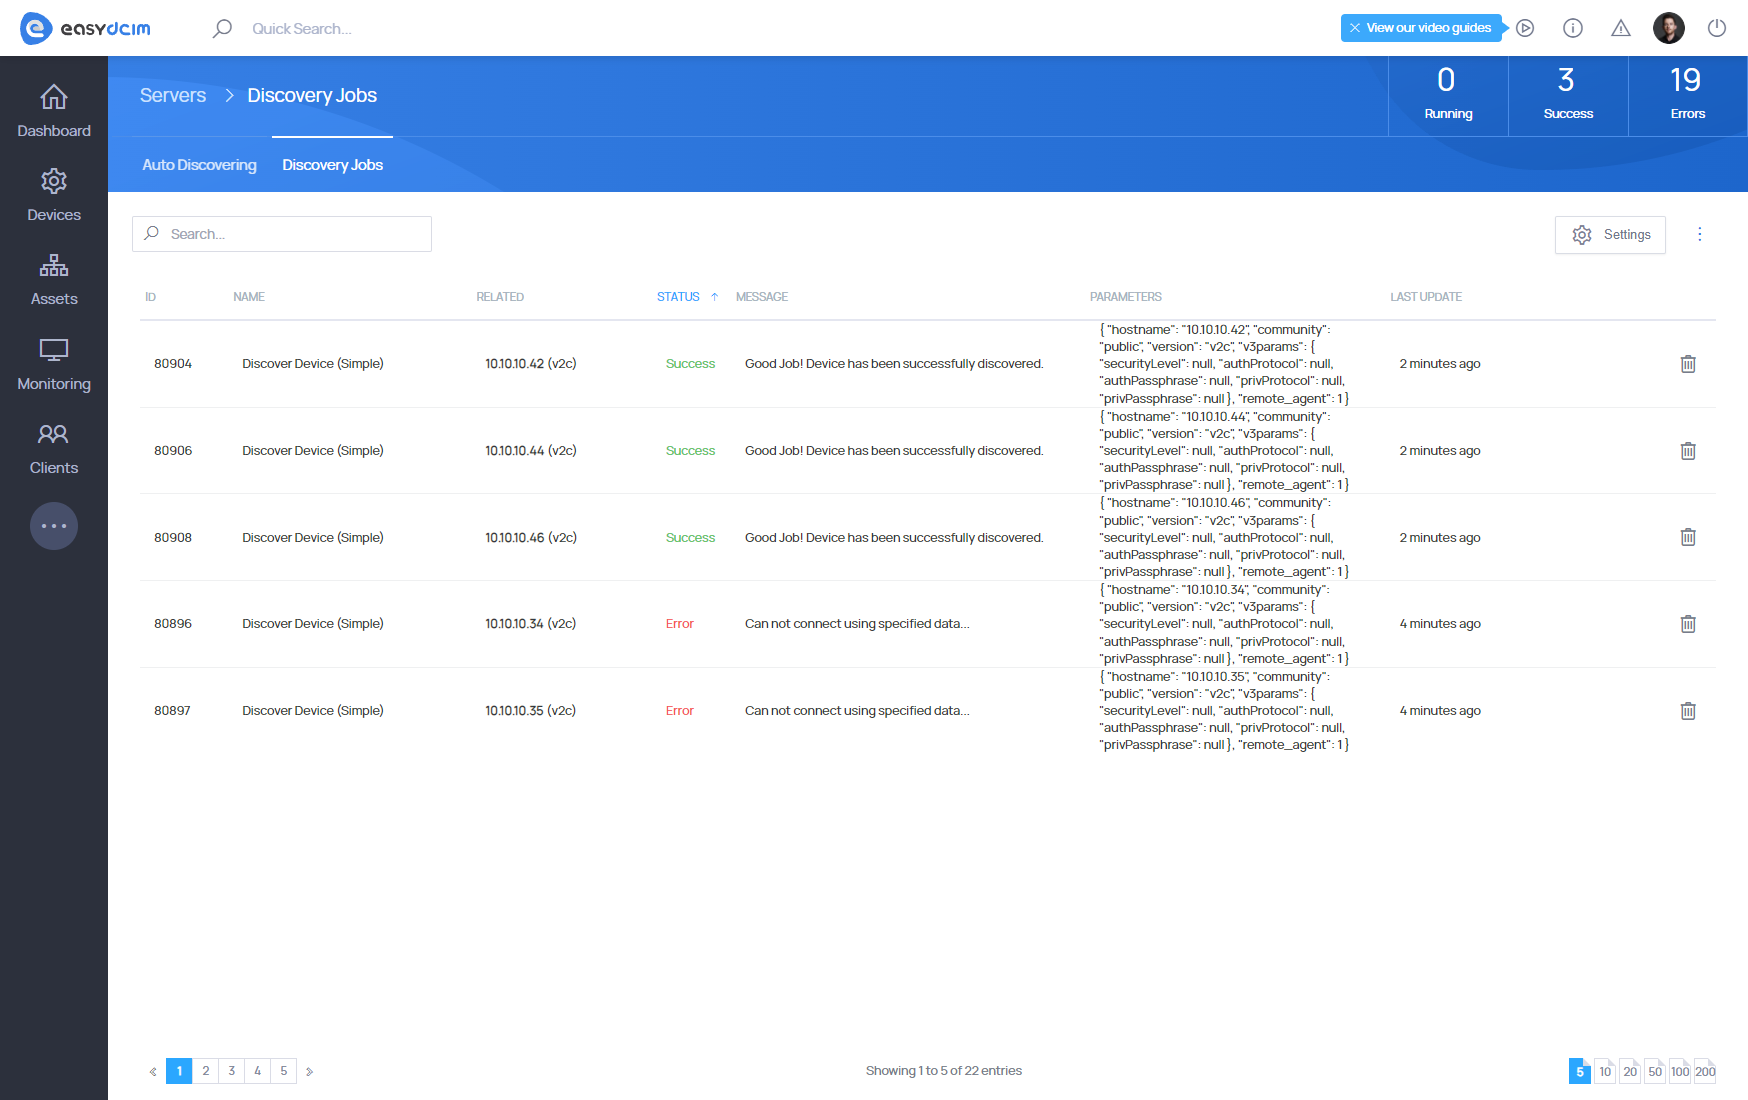
If the SNMP connection can be established, then the server will be added to EasyDCIM and then EasyDCIM will perform automatic advanced discovery of this device in the background.

Mass Add Devices
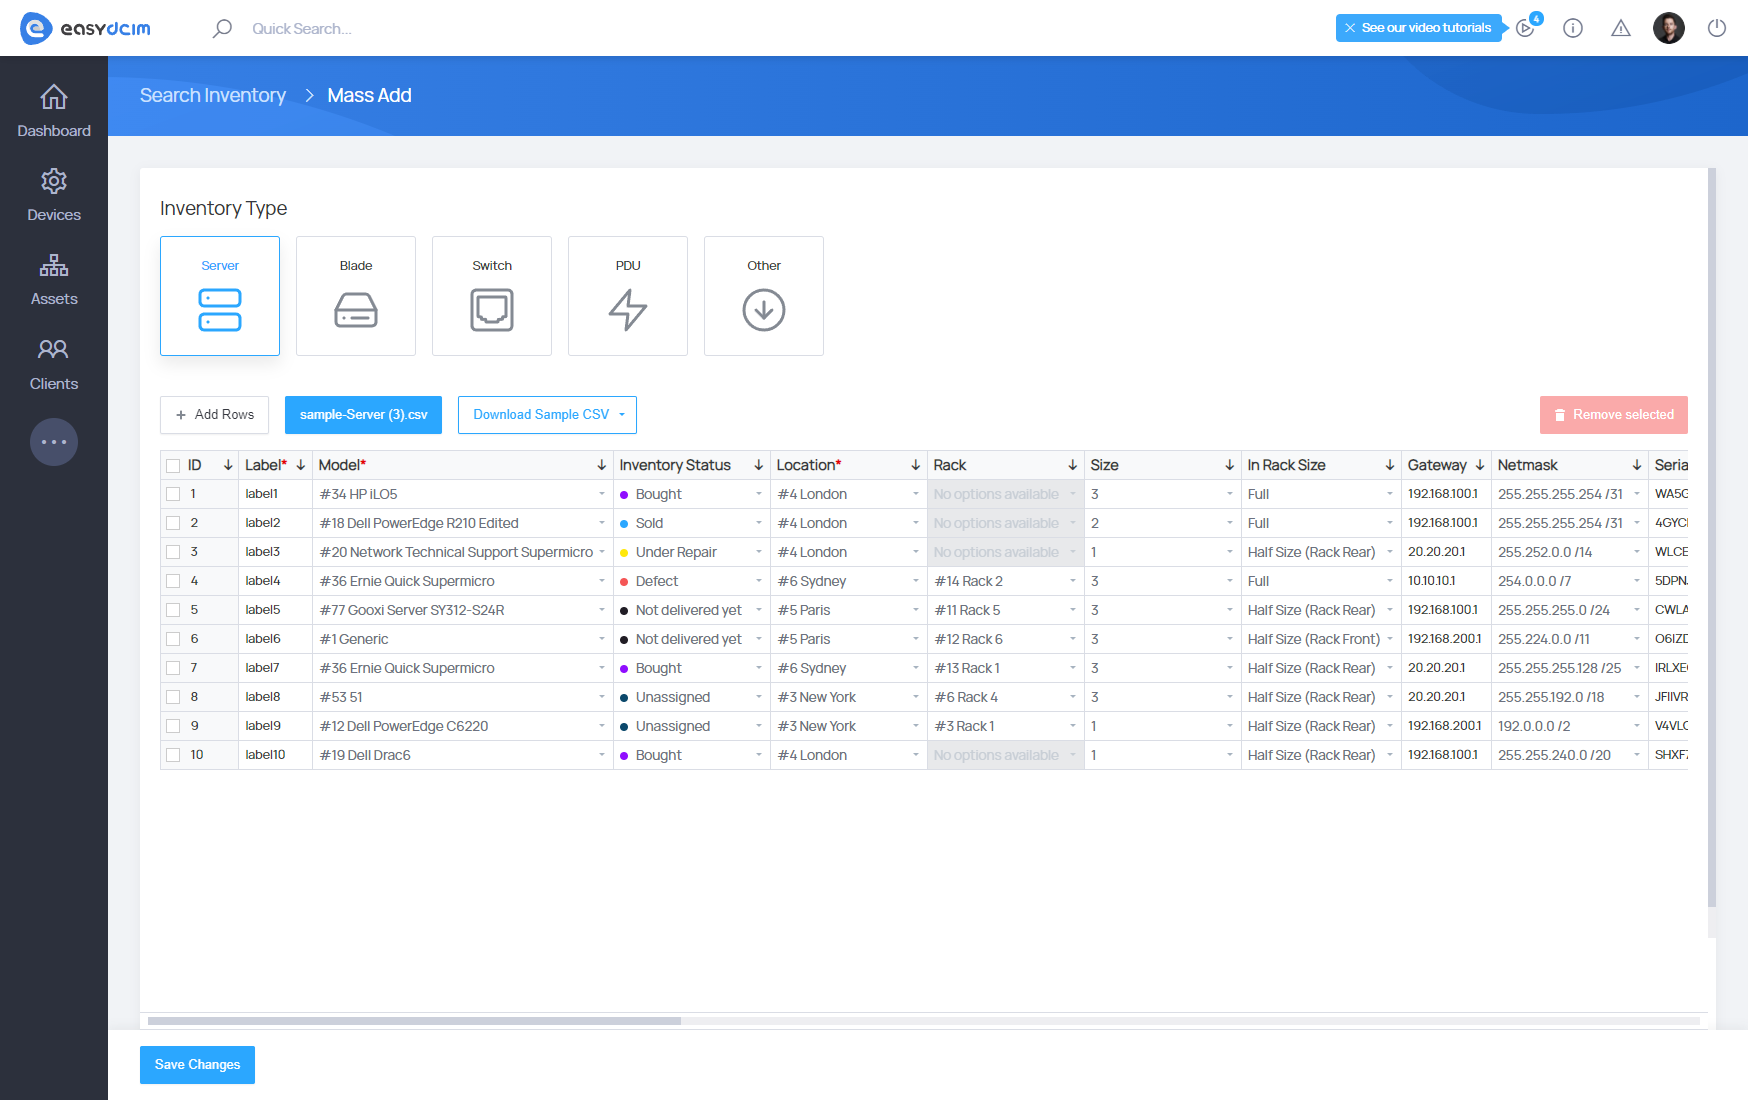
The Mass Add Devices section allows you to add an unlimited number of devices to EasyDCIM in bulk. These can be devices such as:
- Servers
- Blade Servers
- Switches and Routers
- PDU
The Add Devices form is presented in the form of a table with predefined columns. By selecting a device type, the system automatically determines available columns and generates an appropriate table based on them. By default, the table has 10 rows, but you can add and remove appropriate rows using the “Add Rows” and “Remove Selected” buttons.

You must remember that some entities in the system should be added and configured beforehand. These are, for example, device models, locations and racks. Based on the entities available in the system, the system will be able to generate a table with appropriate options for the columns.
In order to add multiple servers to EasyDCIM, select the Server type. The table will be automatically generated. Now, the administrator must populate the table with the appropriate values corresponding to his configuration. The required fields that must be completed for each device type are:
- Device Model - the list is generated on the basis of available device models in the system
- Location - the list is generated based on the available locations in the system
- Label - any device label
The table also allows you to configure key network options, such as:
- Primary IP Address
- Additional IP Addresses
- Gateway
- Netmask
- Hostname
- IPMI Configuration - IP address, user name, user password, driver for JAVA KVM console
After completing all the data, click the “Save Changes” button. If there are no errors, the devices will be added to EasyDCIM and the administrator will be redirected to the list of added devices.
Importing devices
Importing devices is possible with the “Mass Add Devices” function described above. There is also an option “Download Sample CSV”, which contains sample and data-filled CSV files. Based on these files, the administrator can prepare an individual data file with information about the devices in his data center.
When the CSV file is ready, use the “Import From CSV” option and attach the appropriate file in the “.csv” format. The values for the corresponding rows will be automatically imported into the table.
Finally, click the “Save Changes” button. If there are no errors, the devices will be added to EasyDCIM and the administrator will be redirected to the list of added devices.


