IPMI Configuration
The IPMI protocol enables remote administration, monitoring and management of server parameters through the management controller.
To configure the connection to IPMI, select ‘Edit’ from the ‘Actions’ menu located in the server summary view. The setup form has several tabs, in this case, you have to choose ‘IPMI Settings’.
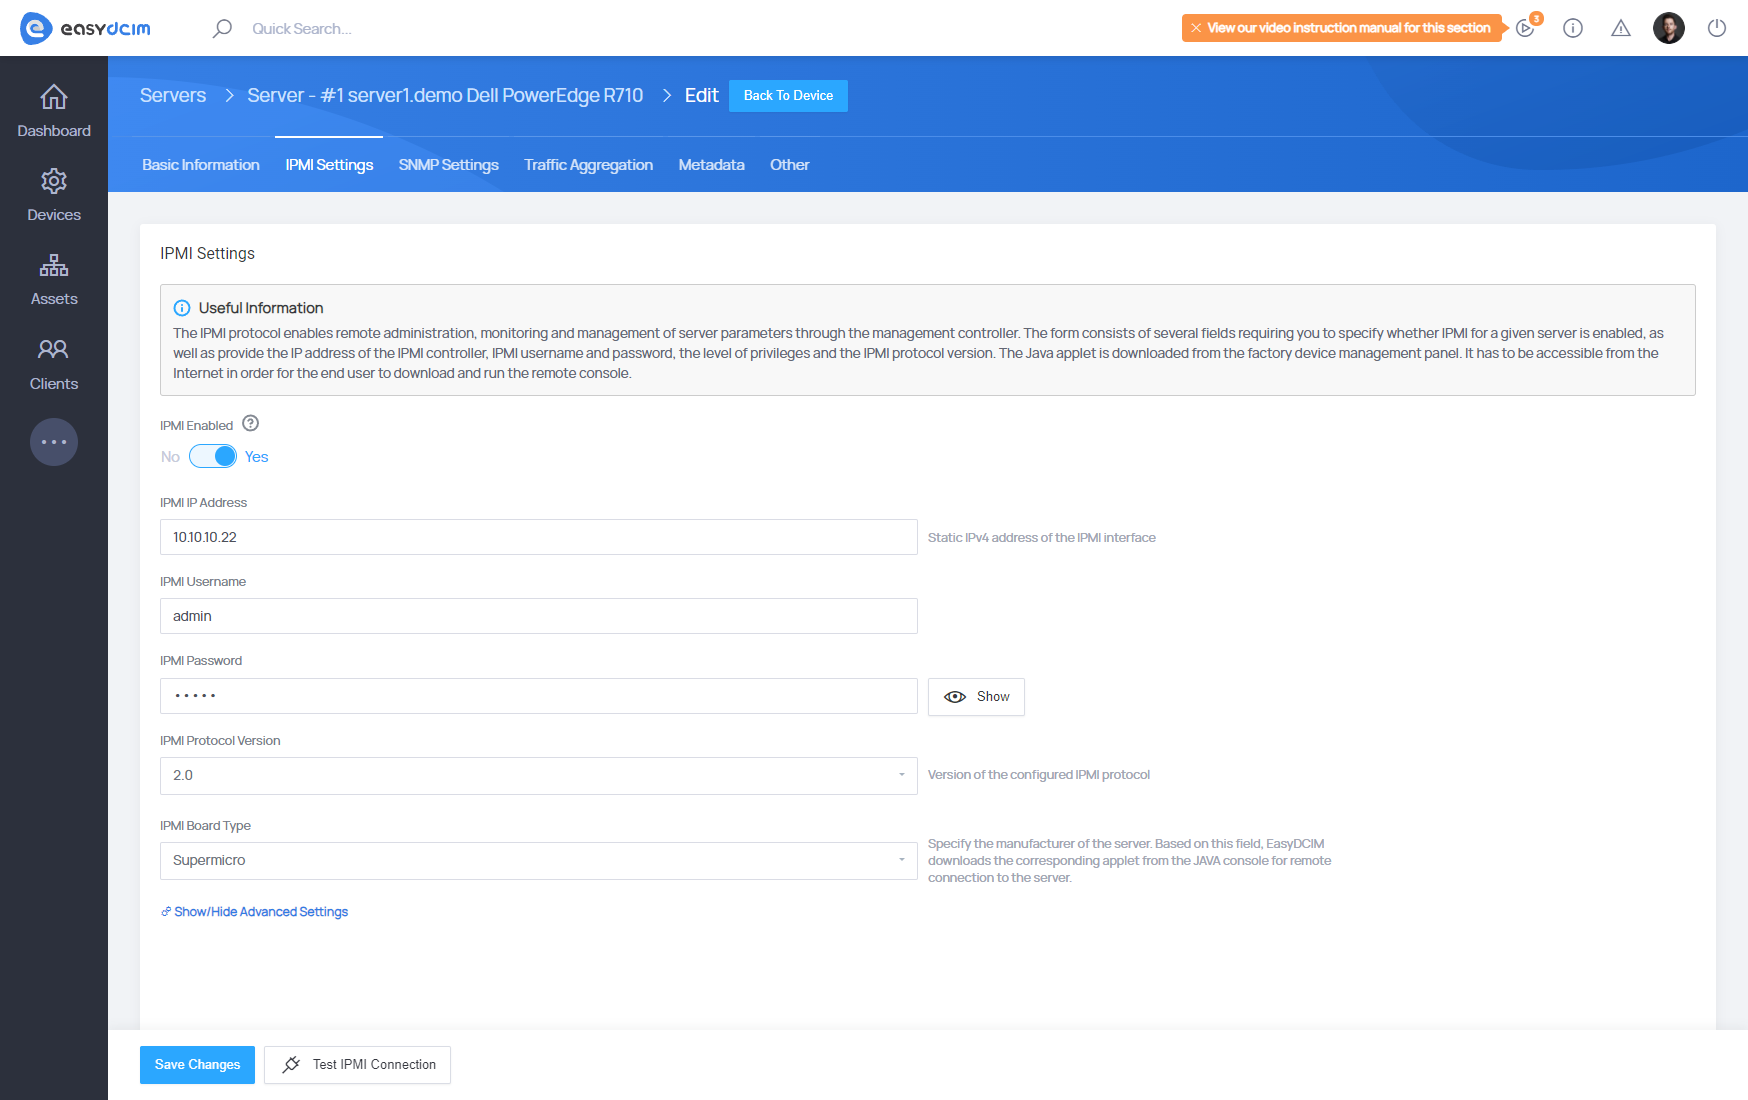
The form consists of several fields requiring you to specify whether IPMI for a given server is enabled, as well as provide the IP address of the IPMI controller, IPMI username and password, the level of privileges and the IPMI protocol version.
The ‘IPMI Board Type’ field shall specify the manufacturer of the server. Based on this field, EasyDCIM downloads the corresponding applet from the JAVA console for remote connection to the server. The default value of the IPMI Port(UDP) field is 623, while the IPMI Remote Console Port field indicates an additional port on which the remote console operates.
Once the form has been filled out and changes saved, you can now test the typed in data. To do so, press the ‘Test IPMI Connection’ button and the system will check the validity of the IPMI connection.
- IPMI Enabled - define whether the IPMI connection should be enabled for this device
- IPMI IP Address - static IPv4 address of the IPMI interface
- IPMI Username - provide your IPMI username
- IPMI Password - enter your IPMI password
- IPMI Protocol Version - the protocol version for most devices is 2.0
- IPMI Board Type - specify the manufacturer of the server. Based on this field, EasyDCIM downloads the corresponding applet from the JAVA console for remote connection to the server.
In most cases, this configuration is sufficient for the IPMI connection. The form also has fields for advanced users:
- IPMI Privilege Level - privilege levels determine which IPMI commands a user can execute over a channel
- IPMI Proxy Server - a proxy server used for IPMI connections. By default, it is the proxy server used by the location of this device.
- IPMI Port (UDP) - assign the port for the ipmitool command, 623 as default
- IPMI Timeout - specify timeout for lanplus interface, 1 second as default
- IPMI Remote Console Port - used along with applet download for Java Console. Default ports: 443 or 80, depending on the hardware manufacturer.
- IPMI Remote Console Login URL - by default, it is the IPMI IP Address. Fill in only if the factory management panel is different from the IP address of the device.
- IPMI KVM Remote Port - KVM Console Redirection Port, default: 5900
- IPMI Additional Arguments - additional arguments to be added to the “ipmitool” command
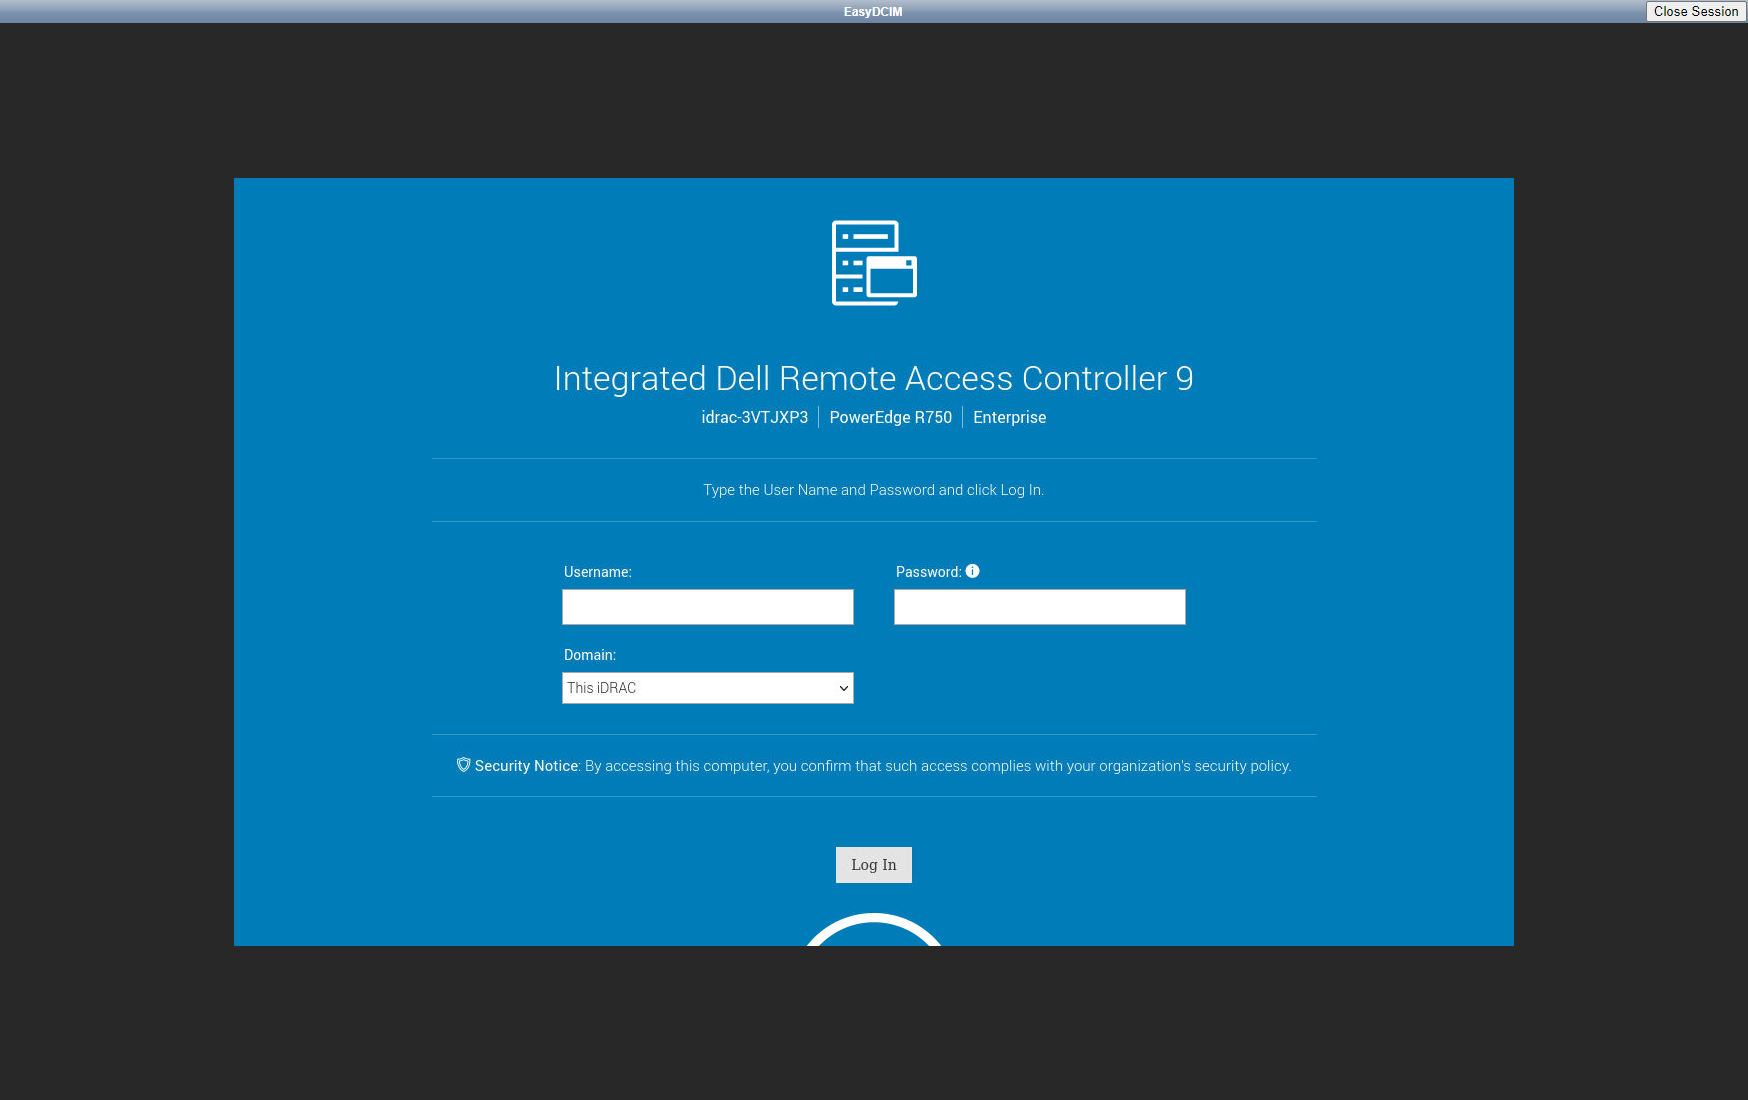
JAVA KVM console
Most companies offer the remote console as a Java applet. Our system supports downloading a remote console for devices with Supermicro, Dell Drac and many more. The Java applet is downloaded from the factory device management panel. It has to be accessible from the Internet in order for the end user to download and run the remote console.
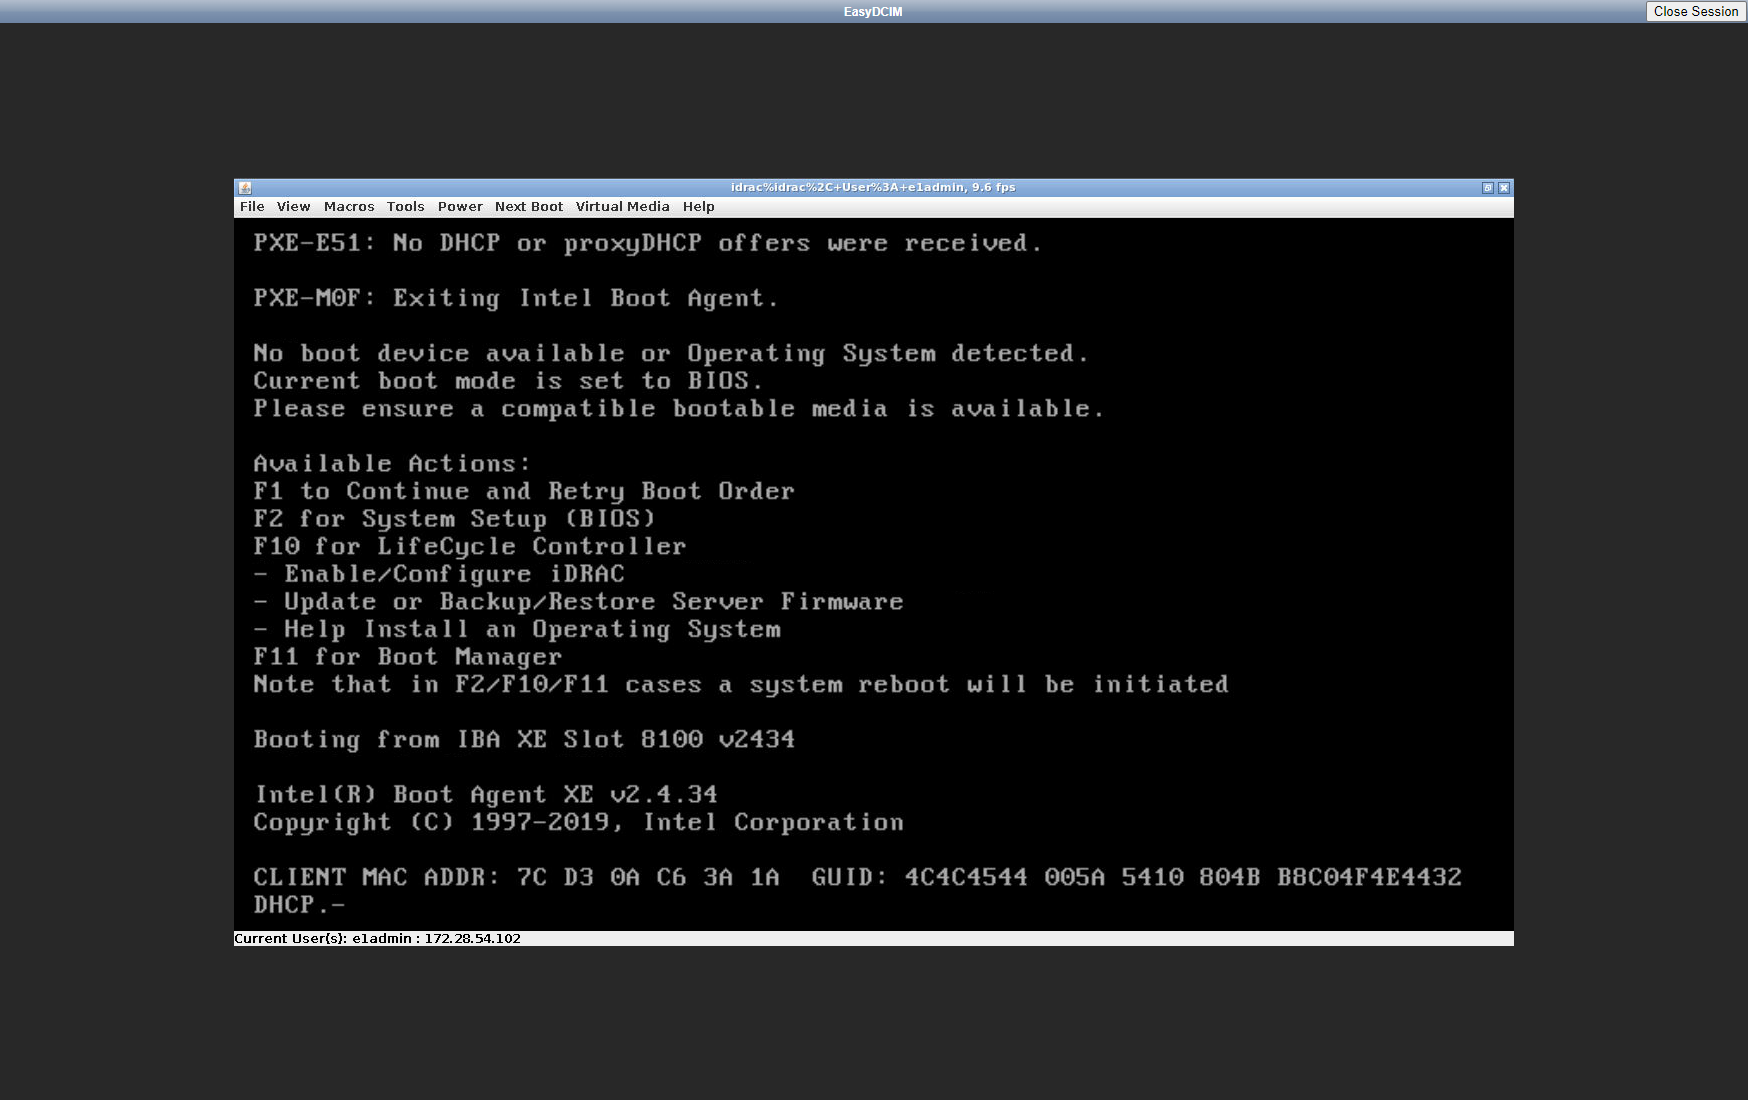
When it comes to the console operation, the most important configuration field is ‘IPMI Board Type’, where you specify the type of the IPMI board for a given device. On this basis, our system selects the appropriate script used to download the JAVA applet from the device management panel.
To download the Java applet, go to the device summary view and find a widget containing the button for the remote console download. The Java applet will be automatically downloaded and launched after you click on the ‘Launch Console’ button.
noVNC console
A noVNC session is created dynamically using the appropriate IPMI Proxy server for the given location. IPMI Proxy servers can be created within the ‘IPMI Integration’ extension. The IPMI Proxy server can be compared to the gateway between the private IPMI subnet and the end client that will use the KVM console. Once the JAVA console applet is downloaded to the remote agent server, EasyDCIM will create a VNC session that sends the image from the proxy server’s virtual screen to the end user. You can read more about the IPMI Proxy server in the IPMI Proxy section.
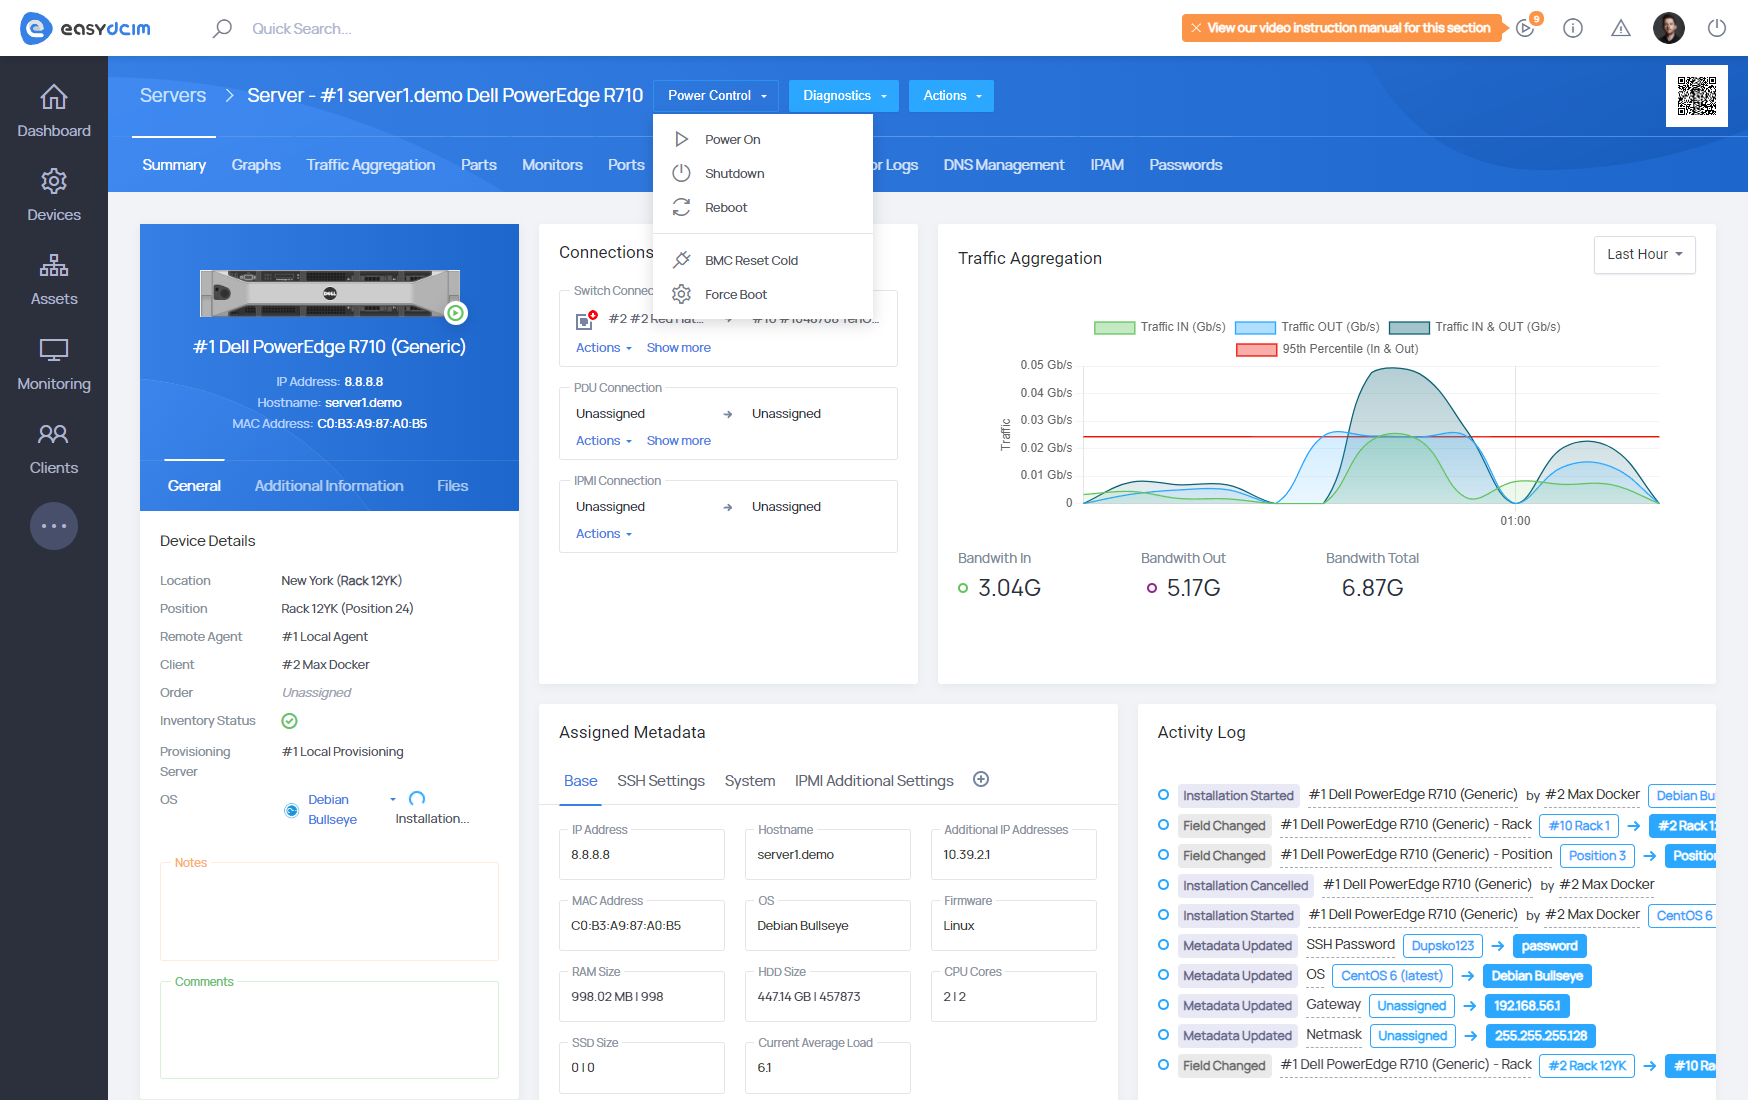
Power control configuration
Remote power control is one of the most important and time-saving features for dedicated servers. The administrator is not always present at the data center in order to manually switch off a given machine, but thanks to the remote start function, it can be done in our system.
In order to configure the option of the remote power control, select the ‘Edit’ option from the ‘Actions’ menu located in the server summary view. There are several tabs in the setup form, in this case, you have to go to the ‘Basic Information’ settings.
In this section, you can specify the first and second method of power control. The default method for a dedicated server is the IPMI control. The system executes the relevant command remotely using a specially constructed ipmitool command. Another method of remote control is the management through the PDU outlet. If your device is connected to a selected PDU outlet, the outlet will perform the remote actions using the SNMP protocol.
After you have configured the remote power control option, you can go to the server summary view. In the upper section, you can find the ‘Power Control’ button containing such actions as Power On, Shutdown and Reboot. After selecting the action, the system will test the remote control of the device based on the previous settings. If the first method fails, the system will automatically run the second method that you have selected.